Archiving K2 blackpearl data
KB000322
PRODUCT
- For information on archiving in K2 Five, please see the article KB002184: Archiving data in K2 Five
- For information on manual script-based archiving in K2 blackpearl 4.6.11 and 4.7, please see the article KB002183: How to manually archive data from the K2 database in K2 4.7
Over time and with operational use, the K2 database increases in size. Since K2 blackpearl retains both current and historical data, historical data will eventually occupy more space than current data in both the K2 database and the SQL Server.
Reducing the size of the K2 database brings improvements in system performance, including performance of the SQL Server and the overall K2 environment. Archiving also reduces the size of the K2ServerLog table and improves reporting performance. It does this by archiving historical reporting data that is no longer immediately relevant, but must nevertheless be kept for auditing purposes. Historical data which is to be archived must always be extracted from the K2 database in a way that enables data recovery. This is especially important where legislation requires that accurate records are kept.
In all versions of K2 blackpearl up to and including K2 4.5 (4.10060.1.1360), K2 blackpearl contained fourteen separate databases. With the introduction of K2 blackpearl 4.6 and K2 blackpoint 4.6, the multiple databases were consolidated into a single database, bringing improvements in performance.
K2 database structures will be different between new installations and upgraded installations. However, both types of installations utilize the same database schema, and the K2 Server will function in the same manner.
For additional information on database consolidation, refer to the following content:
For K2 performance enhancements:
http://help.k2.com/helppages/k2blackpearlDevRef4.6/Performance%20Enhancements.html
For K2 4.6 database considerations:
http://help.k2.com/en/kb001281.aspx
This article will describe what preparations to make before archiving K2 database data, how to archive data, and how to restore archived databases.
Preparation for Archiving
| Note: This step assumes that you are familiar with Microsoft SQL Server, and that you have the necessary local SQL Server permissions to create and manage databases. |
- K2 Server Admin rights are needed to access the Archive node in the K2 Workspace Management Console.
- Users who are logged in do not need database-level rights in order to create archives.
- The K2 Server Service account must have database owner (db_owner) rights to access the K2 database, and any custom created archiving databases.
The K2 Server Service account is used to retrieve data from the K2 database, and archive that data in the custom created archiving database.
The same rights are required when restoring archived data.
By default, an archive database does not exist on the SQL Server. Before data can be archived, it is recommended that a separate database be created as a destination for content which will be archived, and that the database must be given a custom name.
1. From the Windows Start menu, launch Microsoft SQL Server Management Studio.2. In the SQL Server Object Explorer, expand the database instance node (The path seen in the example below is DLX > Databases😞

3. Right-click on the Databases folder. Select the New Database option.
4. Enter the name of the new archive database (in this example, K2Serverlog_Archive will be used) in the Database name entry field:
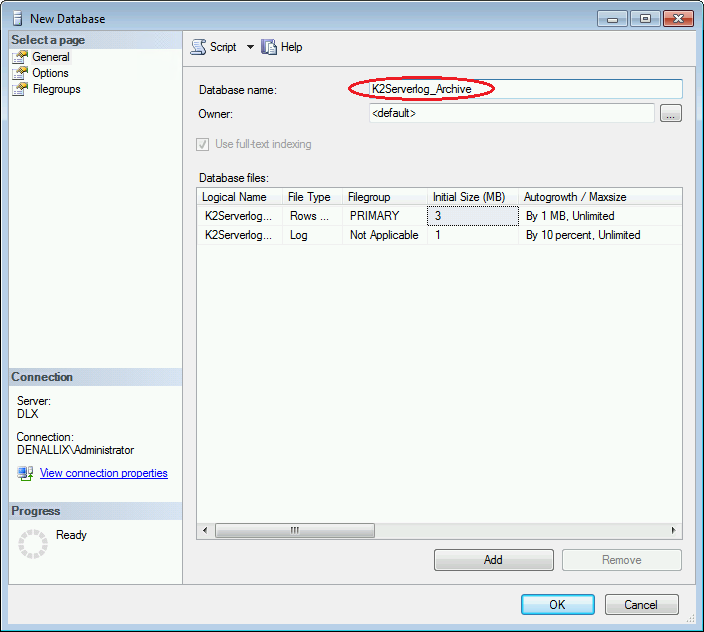
5. Click OK. The newly created database is now ready for use, and will be listed in the Object Explorer.
| Note: The default database settings can be left as-is unless specific settings are required for your environment. In cases like this, custom settings will be needed. |
Now that a destination database has been created to which archive data can be saved, an archive set can be created.
Archiving from K2 Workspace
- Open K2 Workspace, then click on the Management tab to navigate to the Management Console.
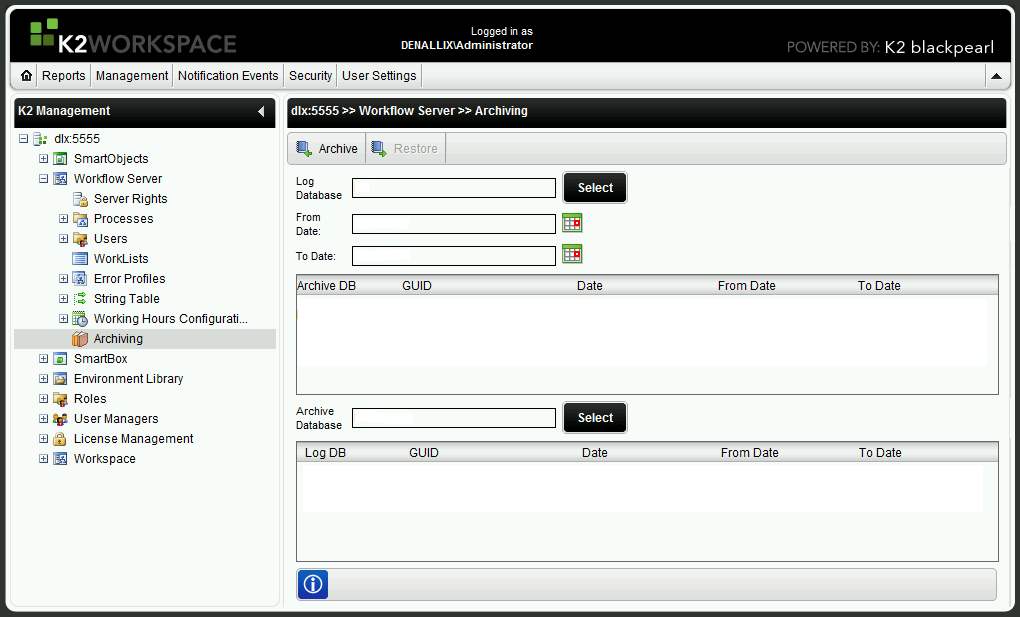
- In the Management Content Explorer, expand the Workflow Server node. Select the Archiving icon.
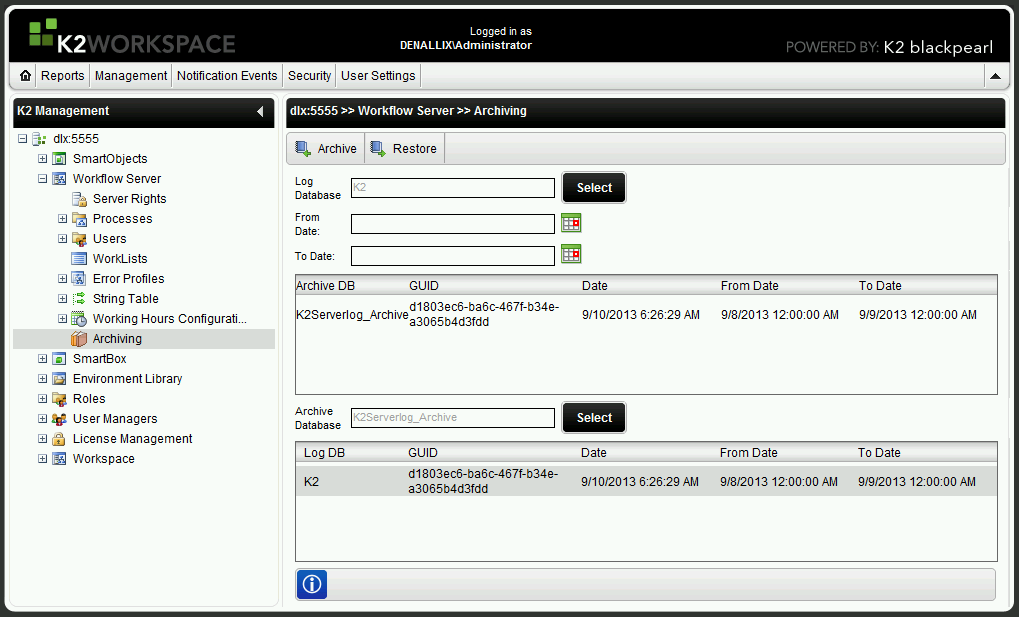
- The Workflow Server >> Archiving window will appear as in the figure below:
- Click the Select button next to the Log Database entry field. Select the database to be archived from the SQL Server window that appears, and click OK.
- The database name will appear in the Log Database entry field of the Workflow Server >> Archiving window.
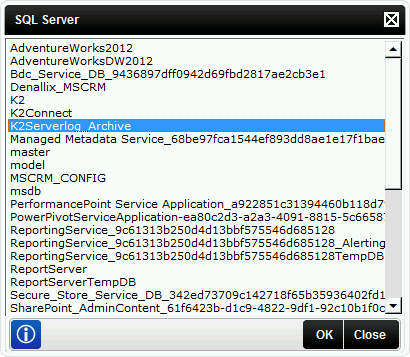
- Click the Select button next to the Archive Database entry field. Select the database to which the data will be archived from the SQL Server window that appears (in this example, K2ServerLog_Archive). Click OK.

Note: You cannot specify the same database in both the Archive Database and Log Database entry fields. - Use the date icons next to the From Date and To Date fields to specify the date range of the data to be archived. The date range begins at midnight on the selected From Date and ends at midnight on the morning following the To Date, and is based on the workflow's Finish date.
- The archive database and log database names will appear in the relevant entry fields of the Workflow Server >> Archiving window. The Workflow Server >> Archiving window should now look similar to the figure below:
- Click the Archive button to begin archiving.
- When the archive process is complete, a SQL Server log window will appear. This window lists all items that were archived, ending with an Archiving Completed Successfully message:
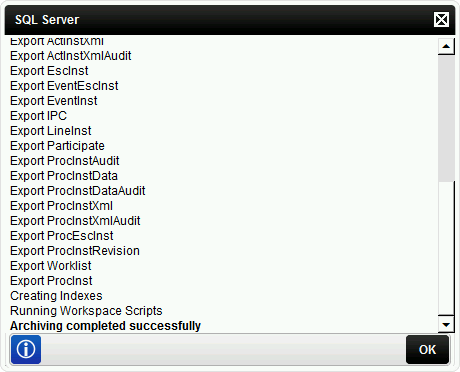
- Click OK to finish the archiving process.
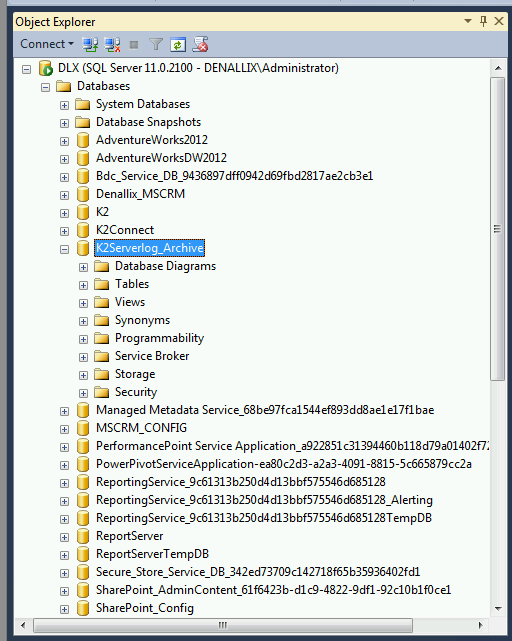
- When archiving is complete, the Object Explorer in SQL Server Management Studio can be used to confirm that the archived content is now within the archive (in the example below, K2ServerLog_Archive) that was created:
Note: If SQL Server Management Studio has been kept open while archiving, the Object Explorer may not show the correct status of archived or restored content. In this case, click the ‘Refresh’ icon in Object Explorer to get the current content status.
Restoring Archived Data
To restore archived information to its original location, follow the procedure below:- Open your web browser. Click the K2 Workspace link, then click on the Management tab to navigate to the Management Console.
- In the Content Explorer, expand the Workflow Server node. Select the Archiving icon.
- To locate the archived database which must be restored, click the Select button next to the Archive Database entry field.
- A SQL Server menu window will appear. Select the archived database to be restored (in the example below, K2Serverlog_Archive). Click OK.
- The archived data set will appear in the Log DB column of the Workflow Server >> Archiving window. If any data sets have previously been archived to the same folder, all data sets will be ordered by the date on which they were archived. Note that in the example below, two separate instances of the K2 data set are given:
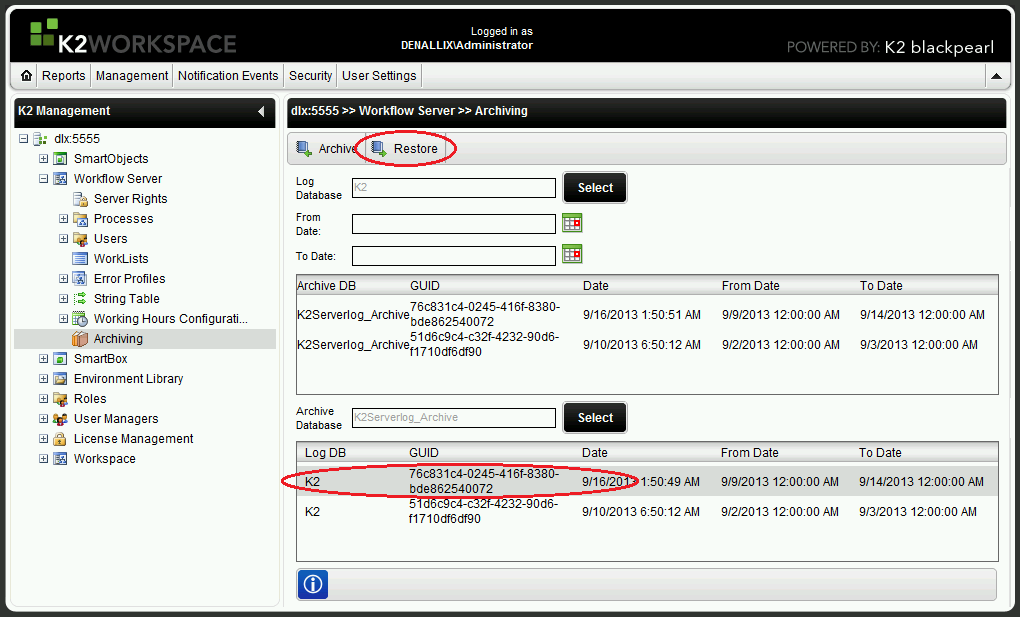
- Select the data set which must be restored, then click the Restore button, as in the figure above.
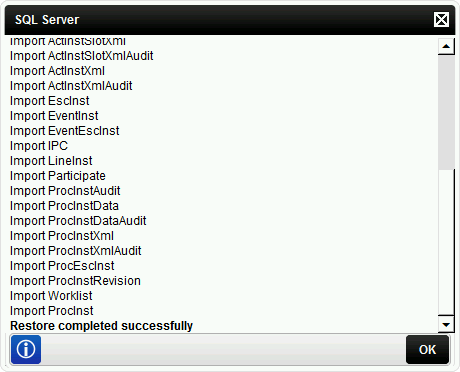
- When the data restoration is complete, a SQL Server log window will appear. This window will list all items that were restored, ending with a Restore Completed Successfully message: