

How to enable cross-network communication with Kerberos on a K2.net™ 2003 Server
KB000072
DOWNLOADSDOWNLOADS
K2.net 2003
SEE ALSOKB000025: K2.net™ 2003 Workspace HTTPS/SSL Configuration
Microsoft Windows Server 2003 Technical Reference
TAGSDeployment
LEGACY/ARCHIVED CONTENT
This article has been archived, and/or refers to legacy products, components or features. The content in this article is offered "as is" and will no longer be updated. Archived content is provided for reference purposes only. This content does not infer that the product, component or feature is supported, or that the product, component or feature will continue to function as described herein.
This article explains how to enable cross-network communication with Kerberos on a K2.net™ 2003 Server.
| The following steps can be taken to enable Kerberos security on a K2.net™ Server.
| |||
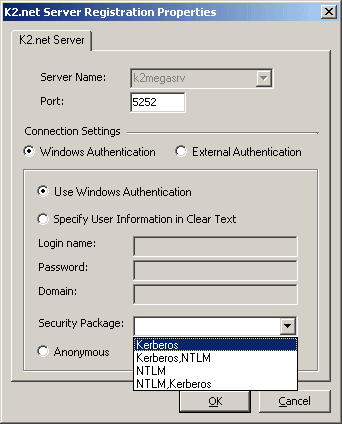
| 1) | Using K2.net™ Service Manager, right-click on the K2.net™ Server where Kerberos should be enabled and select “Edit K2.net Server Registration Properties...”. | ||
 | |||
| 2) | On the “K2.net Server Registration Properties” window, select “Kerberos” as the Security Package and click “OK”. | ||
 | |||
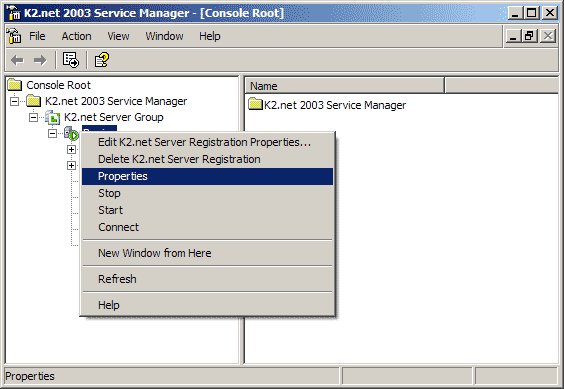
| 3) | In K2.net™ Service Manager, right-click on the K2.net™ Server where you enabled Kerberos and select “Properties”. | ||
 | |||
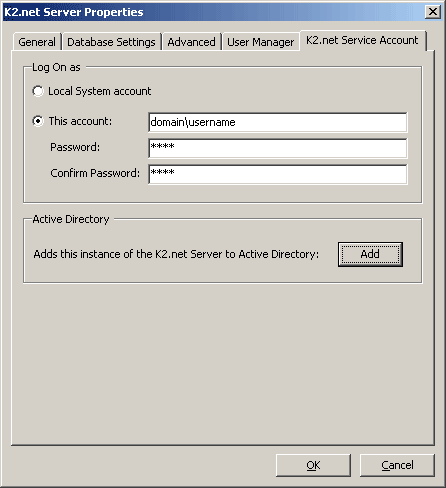
| 4) | On the “K2.net Server Properties” window, click on the “K2.net Service Account” tab and specify the user that your K2.net Service should run under (this user should preferably be a member of the “Domain Admins” group in Active Directory. Note that the user account should be entered as <Domain Name><User Name>. | ||
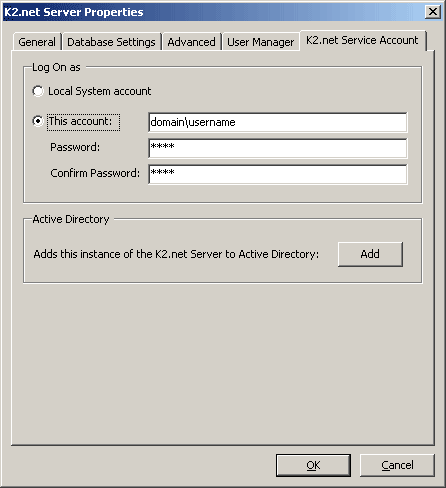 | |||
| 5) | Next, click on the “Add” button to add this instance of the K2.net Server to Active Directory, and then click “OK”. | ||
 | |||
| 6) | If you receive an error stating “Failed to update SPN”, the network administrator should use the “SetSPN.exe” utility as explained in the attached Kerberos Delegation document (provided by Microsoft®) to set a Service Principle Name (SPN) for this account in Active Directory. You should then be able to add this instance of the K2.net Server to Active Directory as explained in step 5. | ||
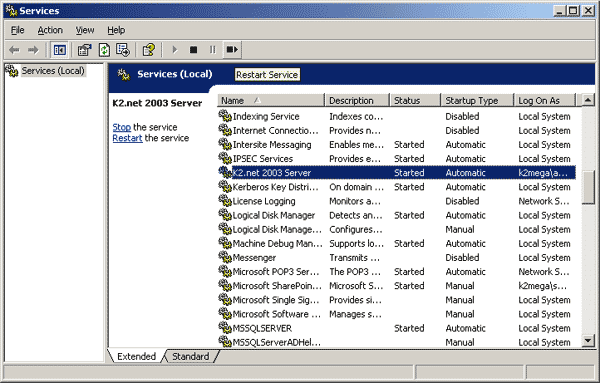
| 7) | Restart your K2.net Service via the Services application. | ||
 | |||
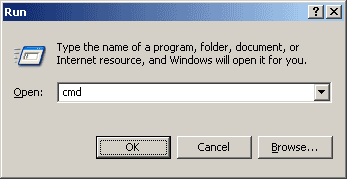
| 😎 | Reset the Internet Information Services (IIS) Service by opening a command prompt window (Click on Start | Run and type “cmd” in the “Open” textbox). | ||
 | |||
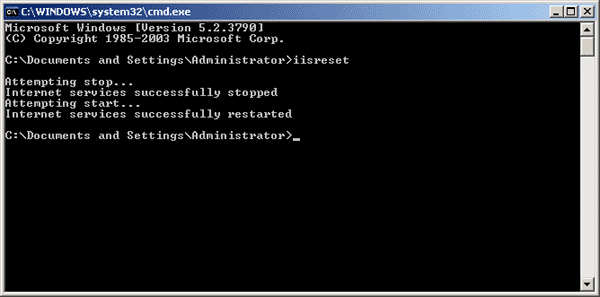
| On the command prompt, type in “iisreset” followed by Enter – you should see the following result | |||
 | |||
| 9) | Kerberos is now enabled on your K2.net™ Server. | ||
