

How To: Configure OAuth in K2
KB001702
Configuring a Service Instance to Use a Custom OAuth Resource
- Information about configuring OAuth in K2 Five is available in the K2 Five User Guide.
- K2 Cloud uses Open ID Connect (OIDC) to authenticate and authorize users. If you were using OAuth in K2 Cloud, or need to use OAuth in a new application that uses the K2 APIs, you’ll need to configure Postman and/or your code to use new client IDs and redirect URIs/Auth URLs. See the article How to retrieve client IDs and Redirect URIs for use in OAuth against K2 APIs for more detail.
OAuth is available as an authentication mode when using many of the SmartObject Service Brokers that ship with K2.
- This authorization mode allows you to connect to OAuth-enabled services such as SalesForce, LinkedIn, Twitter and other systems that use OAuth as an authorization mechanism. (To learn more about OAuth, please see the wikipedia article on OAuth.)
- Authorization Code Flow (vs. Implicit Grant Flow, typically used with Javascript scenarios) allows you to authenticate and then authorize in two separate but related flows.
- Not all third-party OAuth flows adhere to the OAuth 2.0 specification. If the service you're connecting to deviates significantly from OAuth 2.0, K2 may not be able to effectively handle the flow. Look at the provider's documentation and test with K2 in a non-production environment to determine if the flow works as expected.
In order to connect to OAuth enabled services with a SmartObject service broker you need to configure an OAuth Resource Type and an OAuth Resource. The set up consists of the following steps:
- Configure the external OAuth-enabled service and determine its settings.
- Add a new K2 OAuth Resource Type and define the Resource Type Parameters.
- Add and configure a new K2 OAuth Resource based on the type you created in Step 2 and provide values for the parameters.
- Add and configure a new K2 SmartObject Service Instance to connect using the OAuth resource you created in Step 3.
- Finally, you generate SmartObjects that you can use in forms and workflows.
You may use the K2 Management link in the K2 App (Authentication > OAuth > Resource Types) or the K2 Management site directly to configure the K2 OAuth settings.
Step1: Configure the external OAuth-enabled service and obtain OAuth settings
Although OAuth2 is an industry standard authorization framework, each OAuth2 implementation can vary slightly in regard to the parameters used during the token flows. For this reason, the configuration you must do varies between OAuth-based services. The first step is to determine what parameters and values you need to pass to the external OAuth resource for (1) authorization, also known as the access token, (2) token requests, and (3) refresh requests.
For example, the Azure Active Directory OAuth2 implementation uses an encrypted ‘cliend_id’ parameter for Authorization requests, Token requests, and Refresh requests. It also uses the following parameters:
- grant_type
- api_version
- scope
- client_secret
- resource
- entity_id
- response_type
- redirect_uri
These parameters make up the OAuth resource type configuration, while specific values for the parameters make up the resource configuration.
As another example, SalesForce's OAuth2 implementation uses the following parameters: client_secret, redirect_uri, client_id, response_type and grant_type. These properties make up the external OAuth resource configuration, and to obtain these parameters and the values required for the parameters, you must configure Authorization in your SalesForce environment.
Most services describe at least two stages for successful authorization:
- The client (K2) sends an authorization request.
- The service replies with an authorization response.
- The client (K2) then submits a token request along with values received in the previous step.
- Finally, the service replies with a token response. Successive calls from K2 to the service will include this token.
Many services also expire tokens after a set amount of time and accept a refresh request to obtain a new token.
For most OAuth enabled services, like LinkedIn or Twitter, you first need to create an application on their platform, which is the integration entry point. As a part of creating the application, you receive an application ID and a client secret along with the endpoint URI. Once you have the parameters and the application configuration values, you are ready to create the K2 OAuth Resource Type and OAuth Resource.
Step 2: Add a new OAuth Resource Type
If your K2 installation does not already contain a Resource Type for the service you want to connect to, you must create a new Resource Type (think of the Resource Type as a container for the parameters required to connect to a particular service). To get to the K2 OAuth Resource Type configuration page:
- Open K2 Management and go to Authentication > OAuth > Resource Types
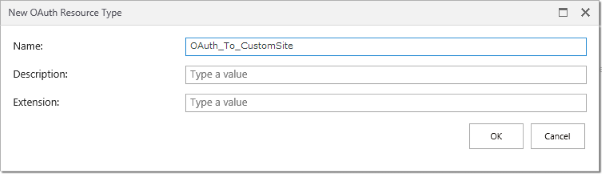
- Add a new Resource Type using the information and parameters identified from the external OAuth resource by clicking New
- Enter a Name and Description to identify the external OAuth Resource Type. The Name is usually the name of the service you wish to connect to (e.g. SalesForce or LinkedIn) since parameters are usually specific to the service.
- Click OK to save the new OAuth Resource Type.
(Extensions are used to handle any scenarios that are not covered by the OAuth2 specification. SharePoint, for example, uses a Server-to-Server, certificate-based token in on-premises installations which is not part of the OAuth2 specification and therefore an extension is used for additional processing in this scenario.)
Define the Resource Type Parameters for the OAuth Resource Type
Once you have added the Resource Type, you can add the parameters to the Resource Type. These definitions create the communication strings that are sent to and received from the external OAuth URI. You add the parameters and their usage configurations in the Resource Type Parameters table. You do not provide values at this point, such as for client_id or client_secret, just the parameter names. The Resource Type defines the default settings and values used by all OAuth resources of this type. You specify your client- or application-specific values when you create the new OAuth Resource.
- With the new OAuth Resource Type you created in Step 2 selected in the Resource Types table, click New in the Resource Type Parameters table. You need to add each parameter you've identified to this table.
- Enter the name of the parameter (for example ‘client_id’) in the Parameter Name text box. The value you enter must match the name of the parameter defined by the external service.
- Add a description and set Default Values, if necessary. Use the checkboxes to indicate what stage of the OAuth flow the parameter is used for, per the OAuth requirements of the external service.
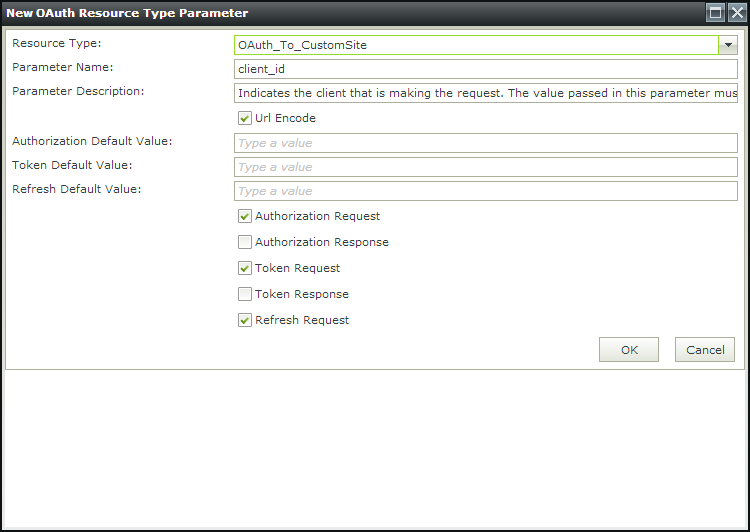
- Click OK to save the parameter.
Repeat these steps until all OAuth parameters are defined.
Step 3: Add and configure a new OAuth Resource
Once all of the required OAuth communication string parameters have been added to the OAuth Resource Type definition, you can create and configure the OAuth Resource.
- In the OAuth node, click Resources.
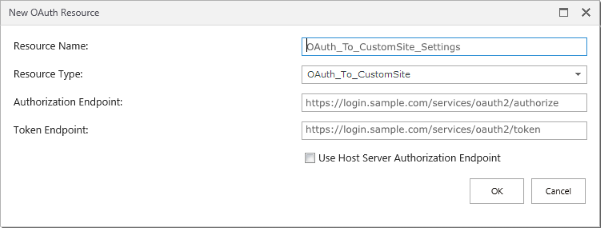
- On the Resources page, click New.
- Enter a Name and Description to identify the specific OAuth resource.
- Enter the Authorization Endpoint URI and the Token Endpoint URI.
- Click OK to save the new OAuth resource.
Configure the OAuth Resource Parameters values
In the OAuth Resources table that appears when you select your new resource, configure the Resource Parameters for the resource.
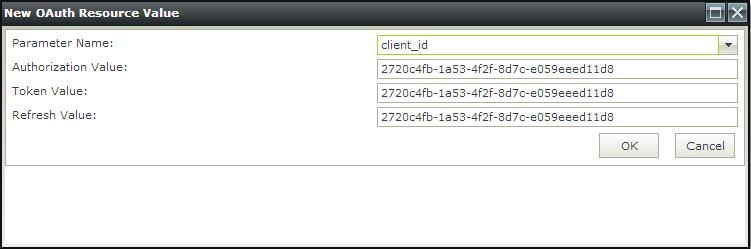
- From the Parameter Name drop-down list, select the Parameter to configure. (This list is populated with the parameters you specified when you created the Resource Type)
- Enter a value for the Authorization Value, Token Value, and/or Refresh Value.
- Click OK
- Repeat steps 1-3 until you've configured all values.
Step 4: Add and configure a new K2 SmartObject Service Instance
Once you've completed the OAuth Resource and its parameter values, the final step is to link the OAuth Resource with the external OAuth service using a SmartObject Service Instance. This ties the line-of-business SmartObjects to the service, which allows K2 and the external OAuth service to securely communicate.
- In K2 Management, open the Integration node.
- Click Service Instances.
- On the Service Instances page, click Add.
- In the Service Instance top section, enter a Display Name and Description that identify this connection.
- Select the Endpoint Service Type used to communicate with the external OAuth resource (WCF, WebService, REST, or SharePoint).
- In the Service Authentication section, select OAuth from the Authentication Mode drop down.
- In the OAuth Resource Name drop-down, select the OAuth Resource you created.
- In the Service Keys section, configure the service instance settings (for example, enter the WebService URL if you are configuring an Endpoint WebService Instance). If you're using the REST broker, you must also specify the local or online path to a Swagger (OpenAPI) descriptor.
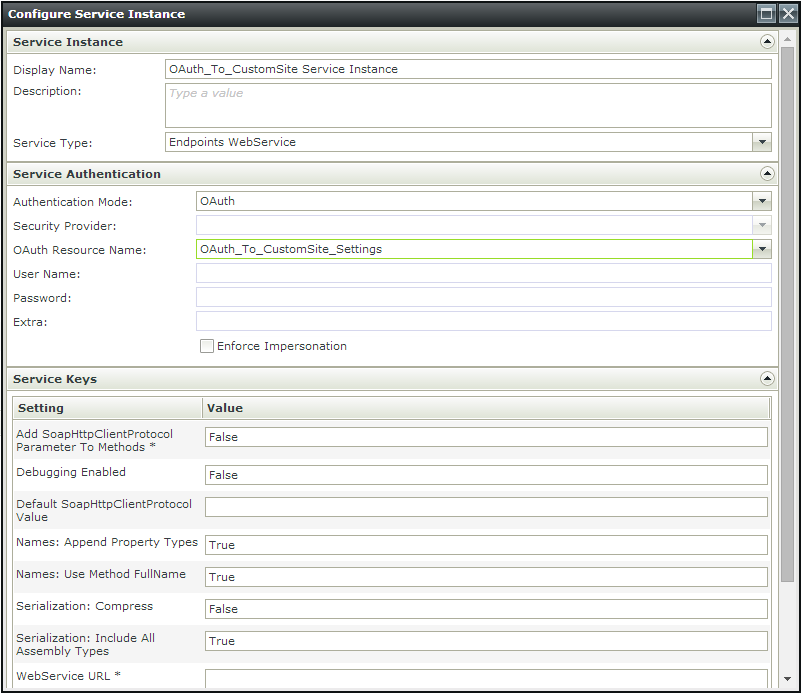
- Click OK at the bottom of the Configure Service Instance page to save the new instance. At this point, you may be prompted to log in to the service and you may also see an Authorization Succesful page that you can close.
Step 5: Using the External Resource
You can now create SmartObjects, for use in forms and workflows, for the service objects found when you created the instance. SmartObject methods execute requests to the service and initiate the OAuth token flow to authenticate, authorize, and interact with the service.
Also see:
