Using digital signatures with K2.net™ 2003 (SP1a) and InfoPath 2003 (with Office 2003 SP1) to trust form templates
LEGACY/ARCHIVED CONTENT
This article has been archived, and/or refers to legacy products, components or features. The content in this article is offered "as is" and will no longer be updated. Archived content is provided for reference purposes only. This content does not infer that the product, component or feature is supported, or that the product, component or feature will continue to function as described herein.
InfoPath 2003 (with Office 2003 SP1) allows you to use digital signatures on a form template (.xsn) file to help ensure the integrity and authenticity of the form template.
| When using InfoPath 2003 for your document templates and SharePoint Server 2003 for your document repository, there may be a company security requirement that you should not assume trust with the SharePoint Server site. For such a scenario, it is possible to make use of trusted (signed) document templates for allowing access to the user’s computer or across domains. Creating the signed document template and process: | ||||
| 1. | Create the form template in InfoPath 2003. | |||
| 2. | Publish the form template to a SharePoint Server 2003 library. | |||
| 3. | Create the InfoPath 2003 and SharePoint Server 2003 integrated process in K2.net™ 2003 Studio. This integration adds K2.net™ 2003-specific fields to the form template (Data Source - _K2 fields). | |||
| 4. | In InfoPath 2003, digitally sign the form template, (which now contains K2.net™ 2003-specific information) – see below for more information on signing the templates. | |||
| 5. | Publish the signed (updated) form template to the SharePoint Server 2003 library. | |||
Follow these steps to remove the old task pane and JavaScript file: | ||||
| 1. | In InfoPath’s design view, go to Tools | Form Options | Advanced... | |||
| 2. | Ensure that the "Enable custom task pane" checkbox is checked. | |||
| 3. | Click on the "Resource Files" button. | |||
| 4. | Delete all the files by selecting each one and clicking on the "Remove" button. Make sure that your list is empty before clicking on the "OK" button. | |||
| 5. | Uncheck the "Enable custom task pane" checkbox. | |||
| 6. | Click on the "OK" button. | |||
| 7. | Remove all K2.net™ 2003 task pane script from the "script.js" file by selecting Tools | Programming | Microsoft Script Editor. Delete the K2.net™ 2003-related script and save it. The K2.net™ 2003 task pane script starts with the comment, "K2.net Task Pane Modifications". Remember that the task pane, along with all the controls, will be removed, so all references to these controls must be removed from the non-K2.net™ 2003 script. You can obviously keep any script that makes use of InfoPath events, as long as this excludes any references to task pane controls. | |||
| 8. | Save and publish the updated InfoPath document. | |||
| From within K2.net™ 2003 Studio, when integrating the process with InfoPath 2003 and SharePoint Server 2003, ensure that the "Display Task Pane with Submit Button" checkbox in the K2.net™ 2003 InfoPath wizard is checked. This will add a new version of the K2.net™ 2003 task pane that does not make use of any script and can be used with .NET managed code. Signing the InfoPath 2003 form template If you digitally sign a form template with a trusted root certificate, you can set the security level for the form template to "Full Trust". This means that the form can access files and settings on the user's computer or on a different domain. | ||||
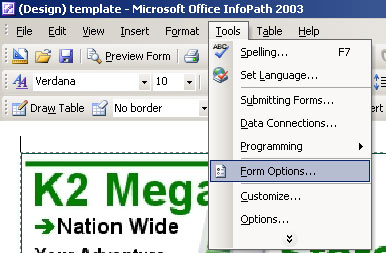
| 1. | In "design mode", select "Form Options..." on the "Tools" menu. | |||
 | ||||
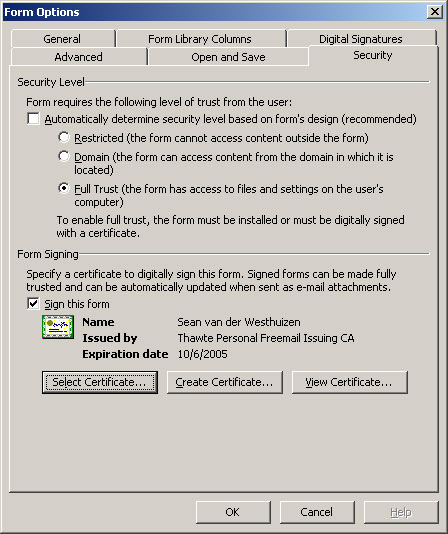
| 2. | In the "Form Options" dialog box, select the "Security" tab. | |||
| 3. | Under "Security Level", select "Full Trust". | |||
| 4. | Under "Form Signing", check the "Sign this form" check box. | |||
| 5. | Click on "Select Certificate". | |||
| 6. | In the "Select Certificate" dialog box, select the certificate that you want to sign the form with. | |||
|
The information in this topic may not apply if you are working with a form designed with Microsoft Office InfoPath 2003 without the Office 2003 Service Pack 1 installed. | ||||
| Using the trusted form template in InfoPath 2003 When a user needs to access the trusted form template he/she will be presented with a security dialog box warning. The user now needs to decide whether he/she wants to trust the form and allow InfoPath 2003 to open trusted document templates from this publisher in the future. | ||||
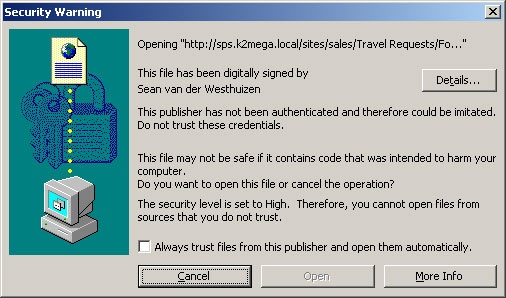 | ||||
| The user needs to check the "Always trust files from this publisher..." checkbox and click on "Open" button. InfoPath 2003 will add this publisher to the trusted publisher list. The user will therefore not be prompted again when opening a signed document template from this publisher. Once a trusted document template has been opened within InfoPath 2003 a "tick" will be displayed in the bottom left-hand corner. This indicates that the template is trusted. | ||||
|
| ||||