How to easily create an XSLT definition to display XML fields in the K2.net® 2003 Workspace for achieving enhanced reporting
KB000067
PRODUCTK2.net 2003
TAGSMicrosoft InfoPath
LEGACY/ARCHIVED CONTENT
This article has been archived, and/or refers to legacy products, components or features. The content in this article is offered "as is" and will no longer be updated. Archived content is provided for reference purposes only. This content does not infer that the product, component or feature is supported, or that the product, component or feature will continue to function as described herein.
This article demonstrates how one can easily create an XSLT definition to display XML data fields in the K2.net 2003 Workspace, by using Microsoft InfoPath.
| By default, XML data is represented as an entire XML string in the K2.net Workspace Process Data report, for example: | |||||||||||
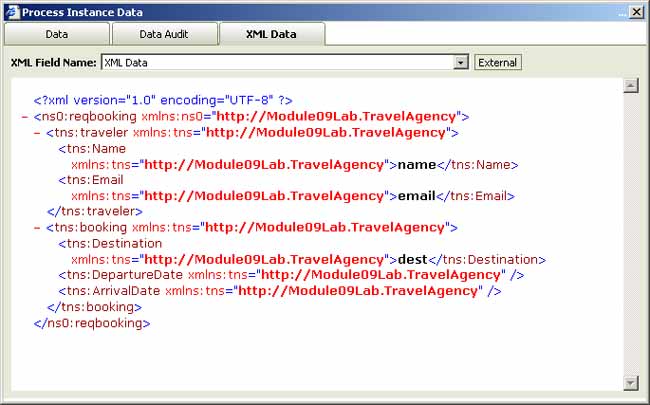 | |||||||||||
| Unless the person viewing this report has knowledge of XML, it will not be easy for them to establish what the data values are. You may create an XSLT definition to represent the XML data in a user-friendly manner, but it can be difficult to create such an XSLT definition by hand. Fortunately, Microsoft InfoPath may be used to easily create XSLT definitions for your XML fields, which can then be imported into K2.net 2003 Studio. These XSLT definitions will then be used in the process data report to display the XML data values according to the XSLT. You can follow this procedure to create and import an XSLT definition into your K2.net process: | |||||||||||
| 1) | Save a sample of your XML Data to an “.xml” file | ||||||||||
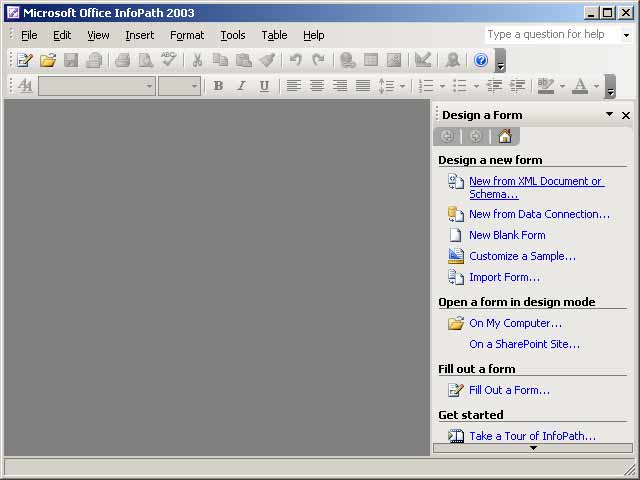
| 2) | Open Microsoft InfoPath and create a new document from your XML file created in Step 1, by selecting “New From XML Document or Schema” under the “Design a new form” heading in the Task Pane, as shown: | ||||||||||
 | |||||||||||
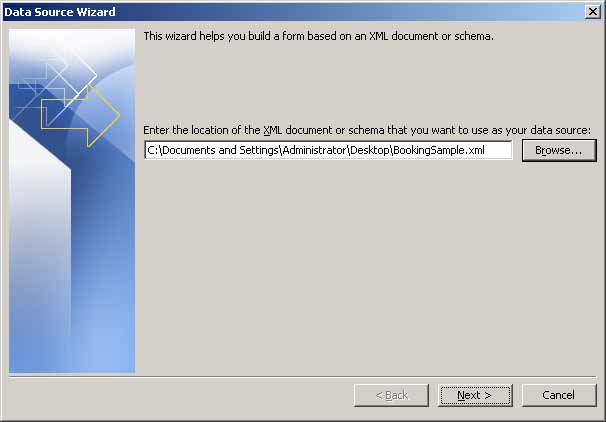
| 3) | Use the “Browse” button and select the sample XML file created in step 1: | ||||||||||
 | |||||||||||
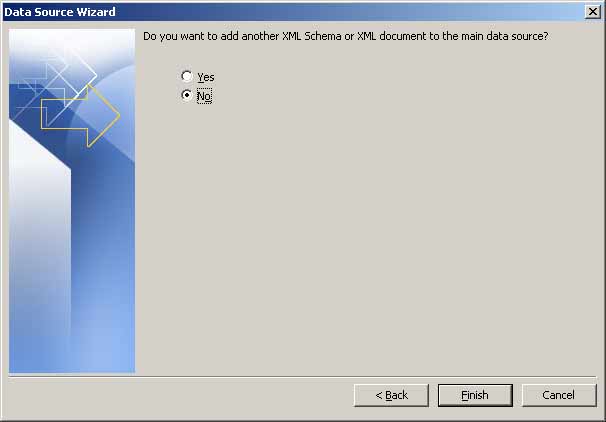
| 4) | Select “No” when prompted if you want to add another XML Schema or XML Document to the main data source: | ||||||||||
 | |||||||||||
| 5) | Select “No” when prompted whether the XML file’s values should provide the default data for your form: | ||||||||||
 | |||||||||||
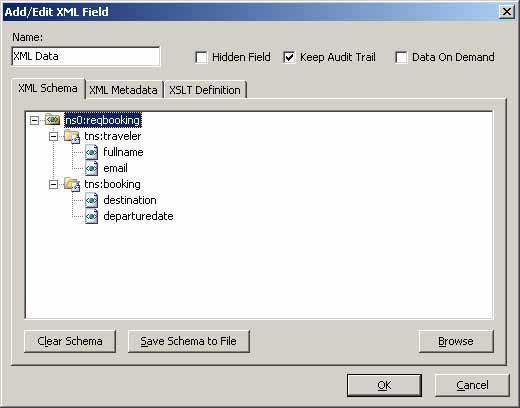
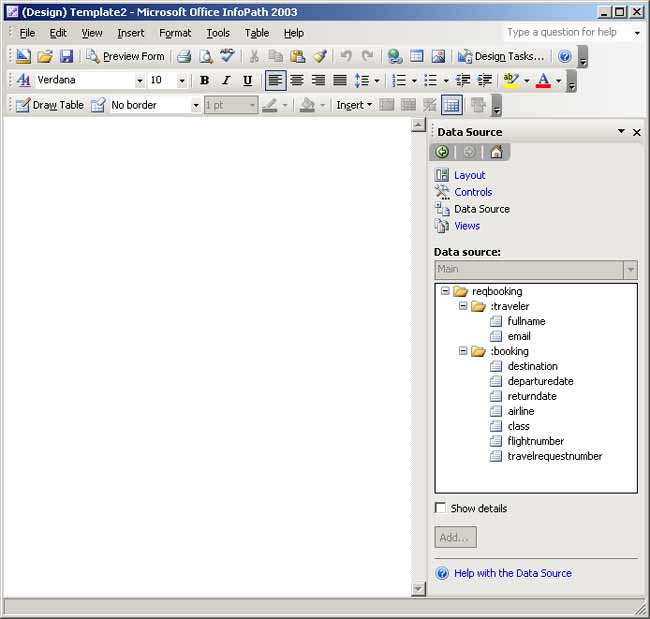
| 6) | You should now see the fields contained in the XML sample file created in step 1 in the “Data Source” Task Pane: | ||||||||||
 | |||||||||||
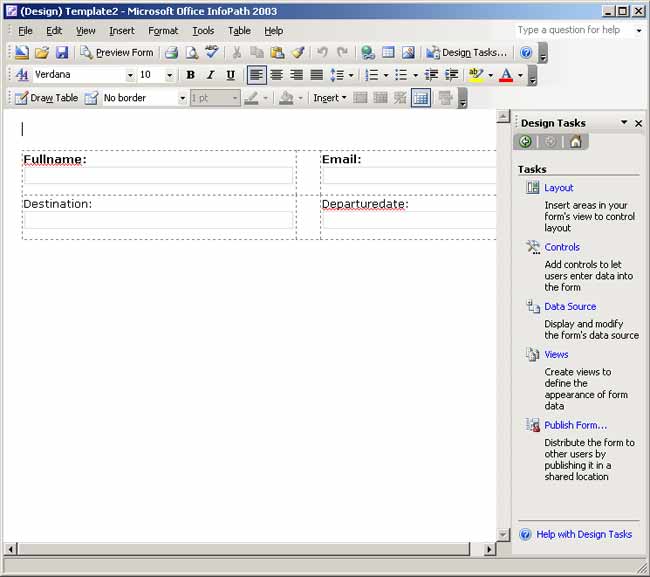
| 7) | Now, create a form by using the “Layout” and “Controls” options in the Task pane. This form design will create the XSLT file which will display the XML data in the K2.net Workspace reports, so effectively the XML data report will look the same as the form that you are designing. The following image is an example of a form layout with the relevant data fields: | ||||||||||
 | |||||||||||
| 😎 | Next, extract your form files from InfoPath to a folder by clicking on File | Extract Form Files. | ||||||||||
| 9) | Once the files have been extracted, open K2.net 2003 Studio and open your process. | ||||||||||
| 10) | Add your XML data fields by right-clicking anywhere on a blank area of the canvas and selecting “Properties”: | ||||||||||
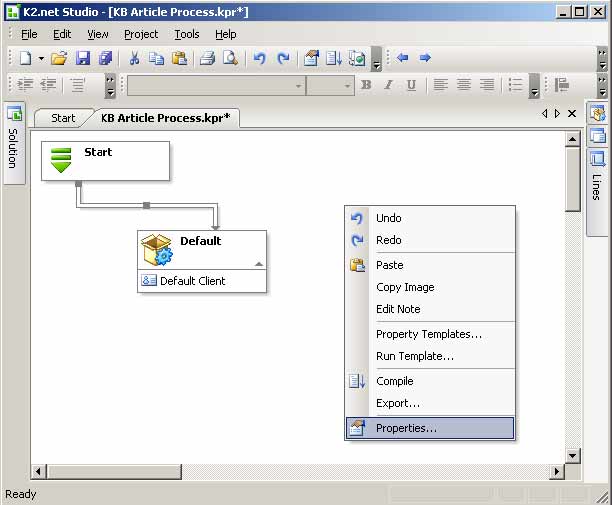 | |||||||||||
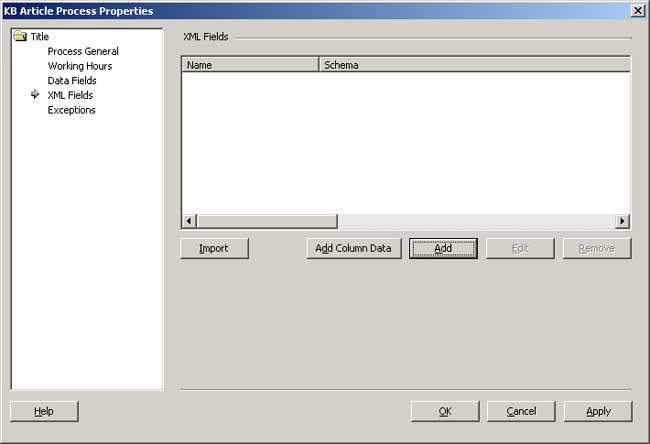
| 11) | The process “Properties” screen will be displayed. Select the “XML Fields” option and click on the “Add” button: | ||||||||||
 | |||||||||||
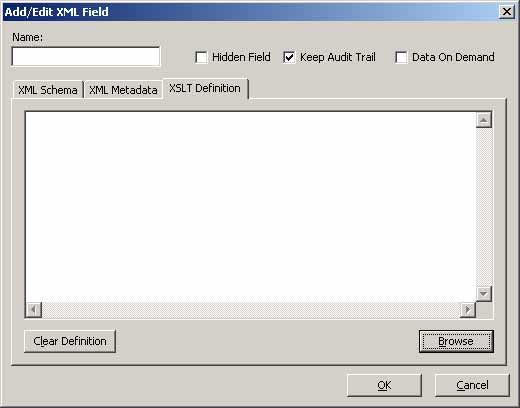
| 12) | On the Add/Edit XML Field screen, select the “XSLT Definition” tab and click on the “Browse” button. | ||||||||||
 | |||||||||||
| 13) | Browse to the directory you created in step 8 and select the ”.xsl” file listed. | ||||||||||
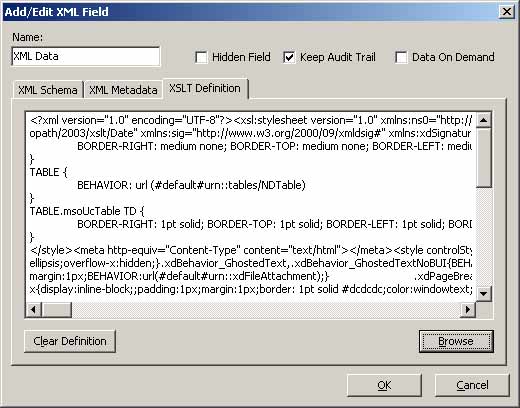
| 14) | You should now see the XSLT Definition in the “Add/Edit XML Field” window: | ||||||||||
 | |||||||||||
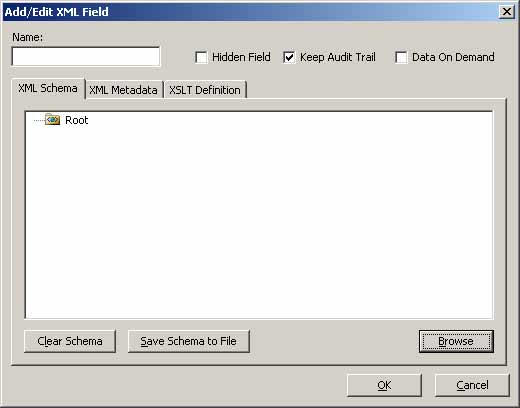
| 15) | If you have not yet created your XML data schema for your process in the “Add/Edit XML field” window, you may import an “.xml” file to create the schema as follows: | ||||||||||
| |||||||||||
| 16) | Export your process definition and start a new instance of the process. | ||||||||||
| 17) | Once the process has started, use the K2.net Workspace to browse to the report for this new process instance, and select the “Process Data” report. | ||||||||||
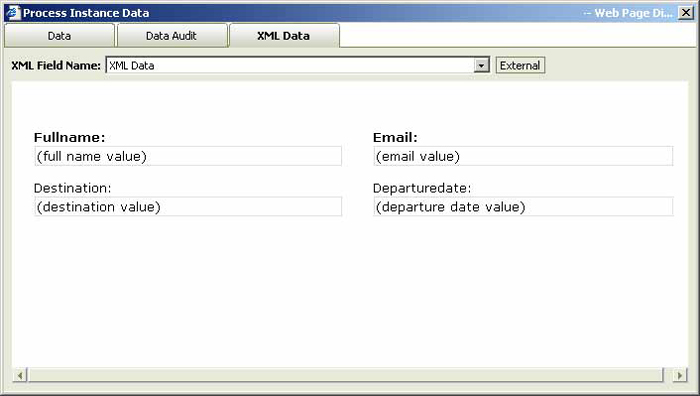
| 18) | Once the “Process Instance Data” report window is shown, click on the “XML Data” tab. Instead of an entire XML string, you should now see the process data represented in the same format as the InfoPath form you designed in step 7, for example: | ||||||||||
 | |||||||||||