

K2 connect Quick Install Guide
KB000707
DOWNLOADS K2 connect Reg Update.reg.txt (1 KB)
PRODUCT
Introduction
This document is a quick installation guide for K2 connect which describes the required manual steps before and after installation. It is important to read through the Installation Prerequisites in the K2 connect user guide before installing K2 connect.
K2 connect 4.6.11 and later requires the SAP Netweaver RFC Libraries (not librfc32.dll). See below for details on downloading these libraries.
How to Install K2 connect
Follow the steps below to install K2 connect:
- For K2 connect 4.6.11.1 and higher copy all the dlls for the SAP Netweaver RFC Libraries from service.sap.com (login required) to the following location:
- For 32-bit machines - C:WindowsSysWOW64.
- For 64-bit machines - Copy the x64 SAP Netweaver RFC Libraries to the C:WindowsSystem32 folder, and copy the x32 SAP Netweaver RFC Libraries to the C:WindowsSysWOW64.
The SAP Netweaver RFC Libraries zip file consists of following dlls:
- icudt34.dll
- icuin34.dll
- icuuc34.dll
- libicudecnumber.dll
- libsapucum.dll
- sapnwrfc.dll
- For K2 connect 4.6.11 and earlier - Copy the librfc32.dll from the SAPGUI machine to the following location:
- For 32-bit machines - C:WindowsSystem32 (ensure that the DLL has the correct version. The size of the DLL is approximately 4984KB).
- For 64-bit machines - the 64-bit version of the librfc32.dll needs to be copied to the C:WindowsSystem32 folder and the 32-bit version librfc32.dll into C:WindowsSysWOW64.
- Run the ERPConnectSetup found in the same location as the K2 connect for SAP installation download. This step is not required if you are installing K2 connect 4.6.10 or later.
- Install K2 connect. Ensure the custom option is selected and then select all components. For step by step instructions see the Installation topic in the K2 connect documentation.
- If an error message displays stating that the default K2 connect Server has not been set, click OK.

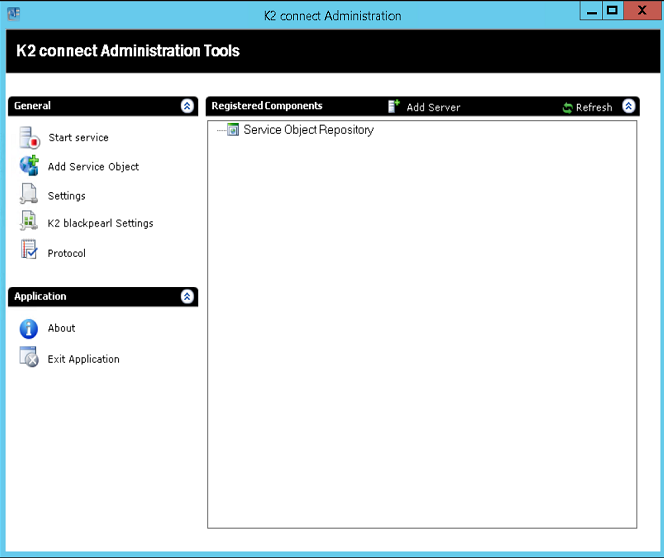
- The K2 connect Administration Tools window will open.
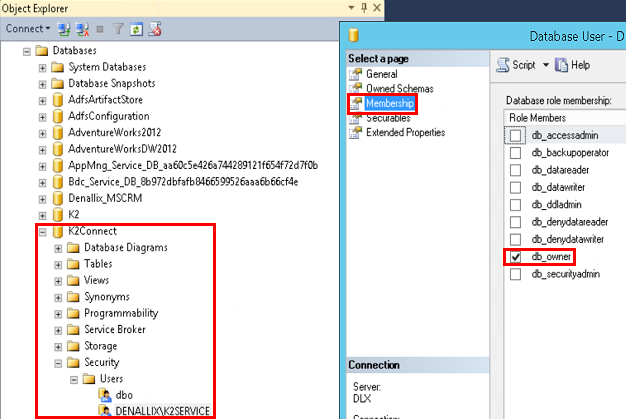
- Add db_owner rights for the account used in the installation on the K2 connect database in SQL. Failing to do so will result in an authentication failure when caching credentials.
- From the K2 connect Administration Tools window, go to Settings > Licensing. Add a valid license key. The license key can be requested from http://portal.k2workflow.com.
- Click on Configure Destinations.
- Right-click on Connectors and select Connectors > Add.
- Type a name for the connector and click on the browse button for the Connector Path. Select SourceCode.ServiceObjectModel.ERP.Connect.dll as the path.
- When prompted to import shared destinations, click No if this is a new setup.
- Right-click on the new connector and select Systems > Add.
- Type a name for the System.
- Right-click on the new System and select Destinations > Add.
- Type a name for the Destination and enter the SAP connection string. It should be in the following format:
- ASHOST=<Server IP> SYSNR=00 CLIENT=800 LANG=EN USER=<User ID> PASSWD=<PWD>
- Make sure User ID and Password are uppercase.
- Click OK and test the connection using "Predefined User Credentials".
- Restart K2 blackpearl Host Server service.
- Under K2 blackpearl settings, click on Register Service Instance.
- If the connection test passes, the setup was done correctly. The K2 connect Designer can now be used to design K2 connect service objects and then map these object to SmartObjects for usage.
Installing Developer Tools
Installing developer tools on a developer machine (e.g. a Windows 8 machine with Visual Studio 2012 and the K2 Designer for Visual Studio 2012 tools installed), the steps are similar but not exactly the same. The entire sequence of steps would be:
- Run the ERPConnectSetup for versions prior to K2 connect 4.611. For K2 connect 4.6.11.1 and higher copy the 6 dlls for the SAP Netweaver RFC Libraries from service.sap.com to the following location:
- For 32-bit machines - C:WindowsSysWOW64.
- For 64-bit machines - Copy the x64 SAP Netweaver RFC Libraries to the C:WindowsSystem32 folder, and copy the x32 SAP Netweaver RFC Libraries to the C:WindowsSysWOW64.
- Run the K2 connect Setup.
- Select K2 Service Object Designer.
- Specify the K2 connect database server name. The database name should be the default K2Connect.
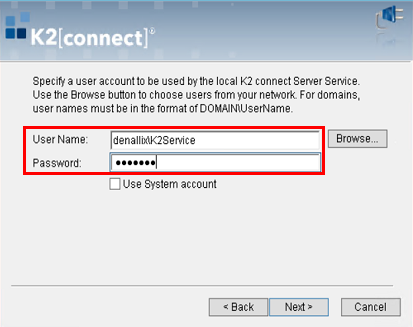
- The designer tools require a copy of the K2 connect server service (but it will not be used). Leave the Use System Account option checked.
- Go to Start > All Programs > K2 connect for SAP > K2 connect Administration. It will prompt for a database update. Click OK.
- In the K2 connect Administration Tools, go into Settings and then select Configure Destinations.
- In the K2 connect Destination Explorer, click on Open Remote Destinations. In the pop-up dialog, specify the K2 connect server name and click OK.
- Before being able to drag the remote destination over, the Connector and System nodes need to be created.
- Right-click on Connectors and select Connectors > Add.
- Give the connector the same name as the server side, to the connector and click on the browse button for the Connector Path. Select "SourceCode.ServiceObjectModel.ERP.Connect.dll" as the path.
- Right-click on the new connector and select Systems > Add.
- Give the System the same name as the server side.
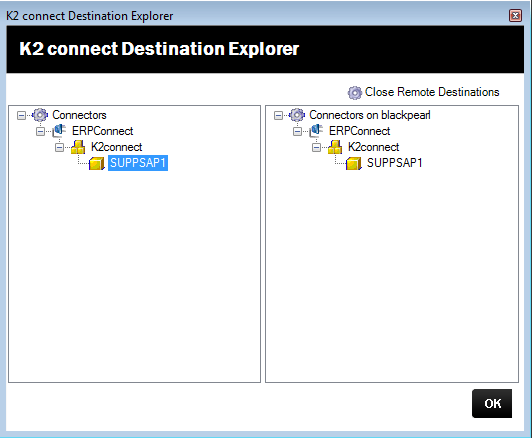
- Now drag the destination node that is configured on the remote server to the local system node as per the image below.
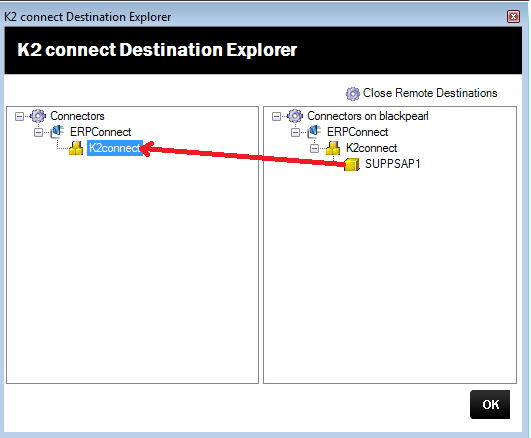
- Once the remote destination is dragged over, it will be configured on the developer machine as illustrated in the image below.
- Right-click on the imported destination and test the connection using "Predefined User Credentials"
- Right-click on the destination that was created and select Set as Default Destination. After this is done, click OK on the remaining dialogs and exit the administration tool.
- Run K2 Designer for Visual Studio as the Administrator. Open the K2 Service Object Designer pane by selecting View > K2 Service Object Designer from the Visual Studio menu.
- On the Service Object Repositories node in the pane, right-click and select Add K2 connect Server. Specify the initial server name that the installation was done on and click OK.
- For the newly added server under the Service Object Repositories node, right-click and select Set as Default.
- A couple of other points when installing the development tools:
- If the client machine installed the binaries in a different location from the K2 connect server (e.g. if you have a 64-bit server and 32-bit clients), you need to make sure the SAP connector's dll is in the same folder location as the developer machine. e.g. C:Program Files (x86)K2 connectConnector.
- Ensure that the developer accounts have rights to the K2 connect database (the minimum rights required is datareader, datawriter and execute rights).
The designer can now be used to build, deploy and test K2 connect service definitions.
