

How To: Integrate K2 and UiPath
KB002436
DOWNLOADS
Discover the options available for integration between K2 and UiPath, for both inbound and outbound communication that allows you to make calls from K2 (via SmartObjects) to start processes in UiPath and how make calls from UiPath interact with K2 forms and workflows.
Table of Contents
- Requirements and Prerequisites
- Setting up K2 to handle UiPath's API Requirements
- Architecture Overview
- Scenario 1: Use a K2 Form or Workflow to call UiPath
- Scenario 2: Using the K2 Activity in UiPath Studio
- Scenario 3: Calling the K2 REST API from UiPath to Start or Action a K2 Workflow
Requirements and Prerequisites
Requirements include:
- K2 Cloud
or
K2 Five (5.2) or later with TLS 1.2 enabled. For more information about TLS 1.2, see K2 and TLS 1.2 Support. - UiPath API Swagger Definition
- UiPath Orchestrator Tenant
Prerequisites include:
- K2 Administrator privileges to configure a new service instance and OAuth resource
- A familiarity with UiPath Orchestrator and Studio
- Dedicated Orchestrator account for use with K2.
In addition to the above requirements, you must have a basic understanding of REST-based web services, Swagger (OpenAPI), and Visual Basic (in UiPath Studio).
This article does not cover UI Path Cloud Platform
Setting up K2 to handle UiPath's API Requirements
The OAuth flow that allows you to call the UiPath APIs requires a custom OAuth extension to get a valid authorization token due to the way in which UiPath implements their authorization. UiPath requires that you specify your tenancy name, user name, and password as part of the body of the request to their API. This is different than the user-based OAuth consent flow that K2 handles out-of-the-box.
Step 1: Create an OAuth Resource Type
Use this step to add a new OAuth resource type.
- Open K2 Management and navigate to Authentication > OAuth > Resource Types
- Click New
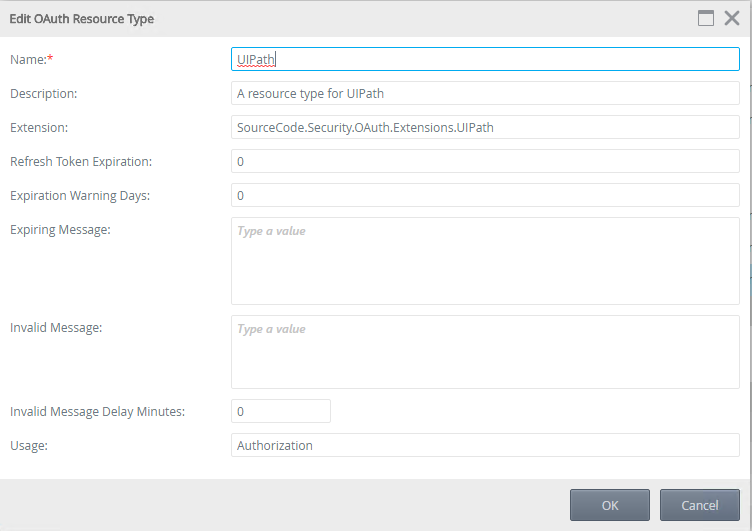
- Specify the following information for the new resource type:
- Name: UiPath
- Description: A resource type for UIPath
- Extension: SourceCode.Security.OAuth.Extensions.UiPath
(Note: this value is case-sensitive, be sure to use the exact same lowercase/uppercase name for the UiPath extension) - Refresh Token Expiration: 0
- Expiration Warning Days: 0
- Invalid Message Delay Minutes: 0
- Usage: Authorization
Your new resource type looks similar to the following:
- Click OK to save your changes and note the new type on the Resource Types list
Step 2: Add Resource Type Parameters
You need to add parameters to the UiPath resource type.
- Select the UiPath resource type to open the Resource Type Parameters section
- Click New from the toolbar and add the following parameters:
- usernameOrEmailAddress
- password
- tenancyName
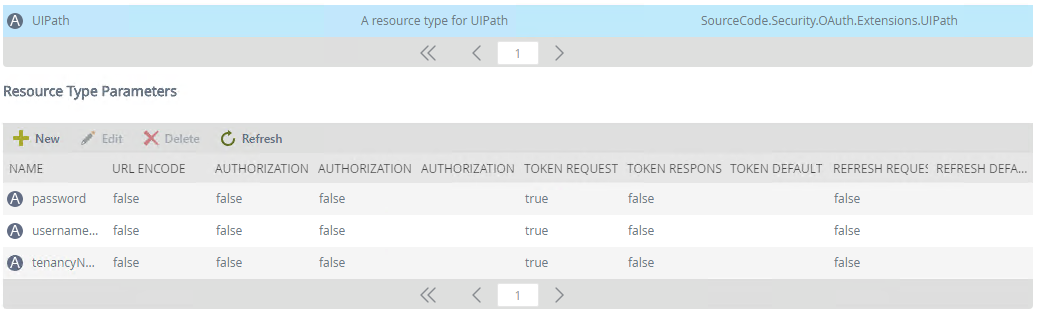
For each parameter check the Token Request option, and then click OK.
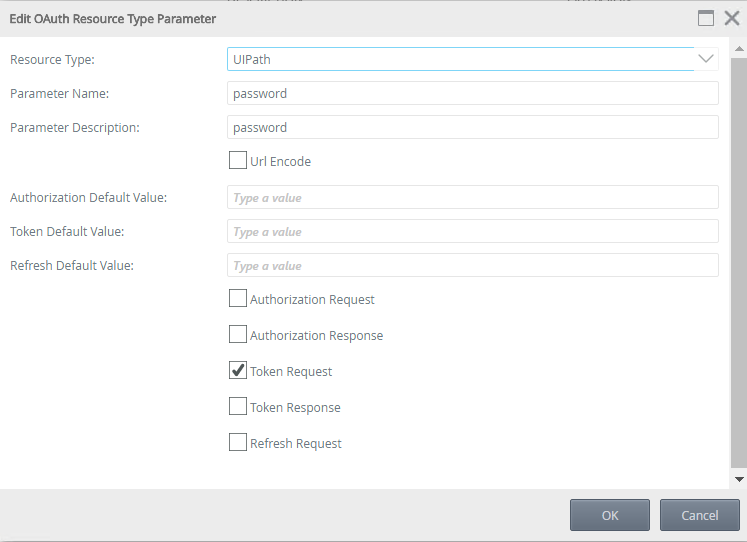
Your parameters look similar to the following:
Step 3: Create and Configure an OAuth Resource
OAuth resources are instances of an OAuth resource type, and contain configuration values to provide authorization tokens for a system. For example, if you have two UiPath tenancies, you'd create two OAuth resources based on the type you created in step 2.
- In K2 Management navigate to Authentication > OAuth > Resources and click New
- Give it a name, such as UiPath - Test, select UiPath as the type, and specify the OAuth token endpoint for your UiPath environment.
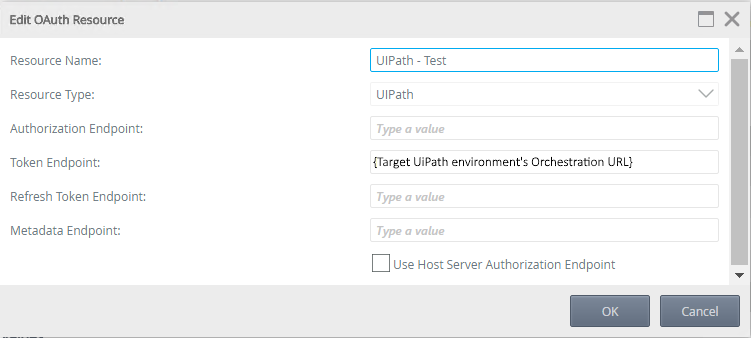
- Click OK
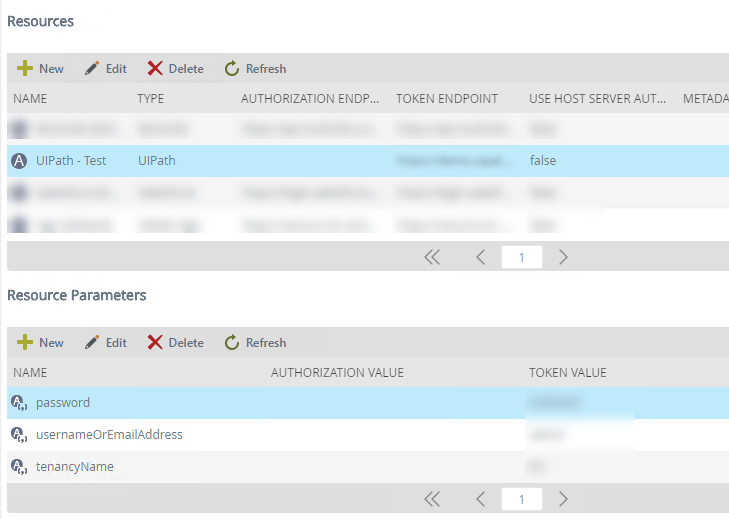
- Select the new resource and configure its parameters
- Click New in the resource parameters list to specify a Token Value for each of the parameters, usernameOrEmailAddress, password, and tenancyName. These are the values you use when calling the UiPath API.

Your page looks similar to the following and K2 is configured to communicate with UiPath.
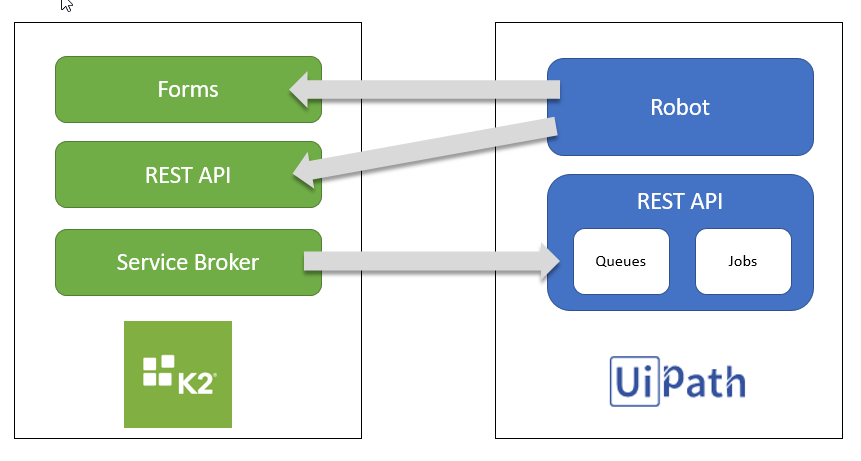
Architecture Overview
Use the following diagram and scenarios for discovering how to enable two-way communication between K2 and UiPath.
Scenario 1: Use a K2 Form or Workflow to call UiPath
You typically use two main UiPath APIs, Queues and Jobs, in your K2 form or workflow. Use Queues to load a queue with work for a robot to process. Use Jobs to execute a process.
The name of the queue is defined in UiPath Orchestration. The name/value pairs that you need to send into the queue depend on how the UiPath process designer created it, so you'll need to know what these are before you can load a queue.
Use Jobs to start UiPath processes, which is different from how you start K2 processes/workflows. Loading a queue and starting a job is how you put a robot to work.
You call this API using an instance of the K2 REST service type, configured to use the UiPath OAuth resource and the attached Swagger descriptor.
- Browse to the K2 Management site and navigate to Integration > Service Types
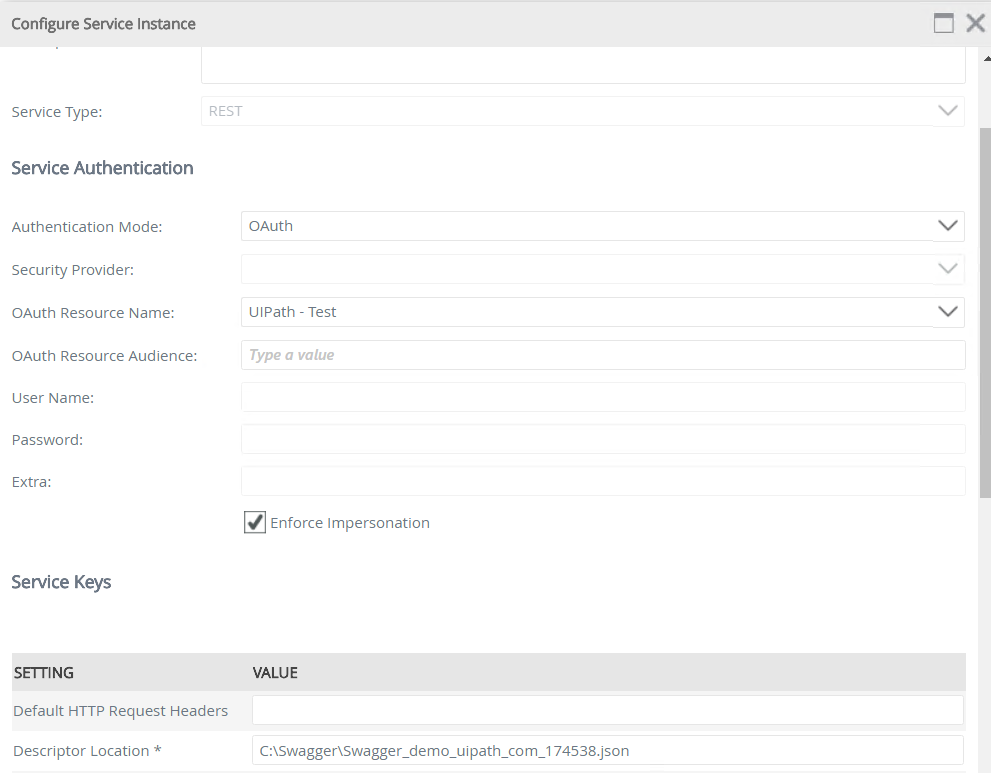
- Find and select the REST service type and click New Instance
- Give the instance a name, select OAuth as your Authentication Mode and the UiPath OAuth resource as your OAuth Resource Name
- Specify the full path and filename of your descriptor file for the Descriptor Location. An example descriptor is available at https://cdn-cms.k2.com/kbs/repository/data/json/Examples/UiPath/uipath-withauth.json. Your page looks similar to the following:
- Click OK to create the service instance
- Select the Service Instance node, then find and select the UiPath service instance
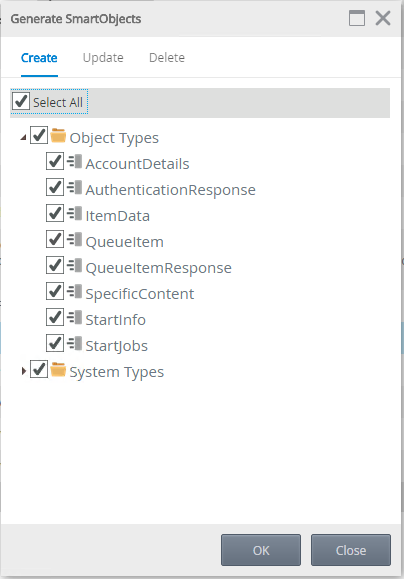
- Click Generate SmartObjects in the toolbar, and then click Select All on the Generate SmartObjects dialog. Click OK.
You use the Add_Queue_Item method of the QueueItemResponse SmartObject to add items to the queue, and the StartJobs SmartObject to start a UiPath process. For more information about working with complex types, see Working with Endpoint SmartObjects: Serialization and Deserialization. A Postman collection of the API calls is available for download to help you understand the requirements of the UiPath APIs and help test your solution.
Once you have your SmartObjects and you know how to use their methods, you can use these SmartObjects in SmartForms and workflow SmartObject events to integrate with UiPath.
Scenario 2: Using the K2 Activity in UiPath Studio
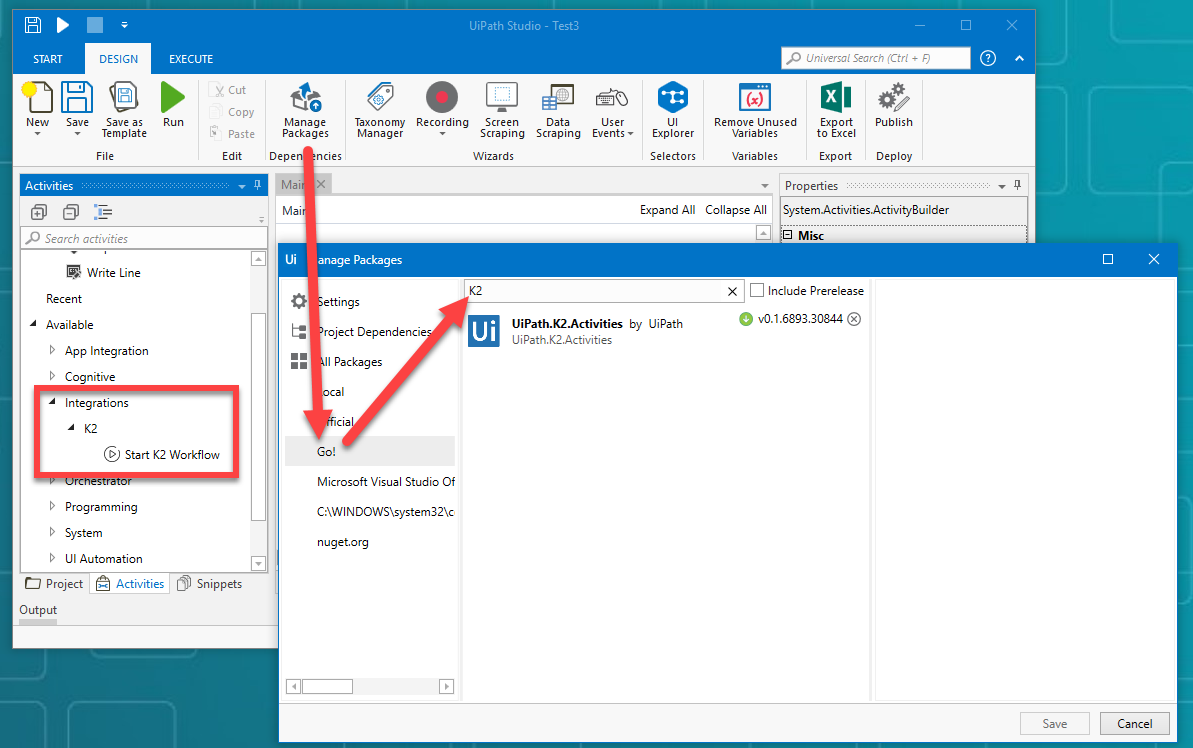
The UiPath.K2.Activities package allows you to start K2 workflows and is available to download from the UiPath GO! Community site.
You must install the package using the Manage Packages (Ctrl + P) menu in UIPath Studio, selecting All Packages > Go! and searching for K2.
Once installed, you see the activity in your Activites panel.
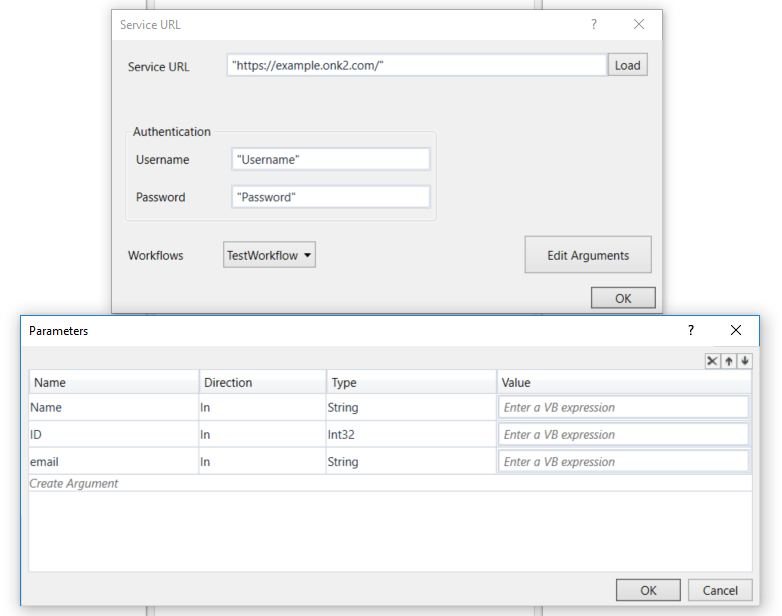
To use the activity, drag it onto the design canvas from the panel and follow the wizard. For more information, see the documentation in the UIPath Integrations Guide.
Scenario 3: Calling the K2 REST API from UiPath using the HTTP Request Activity
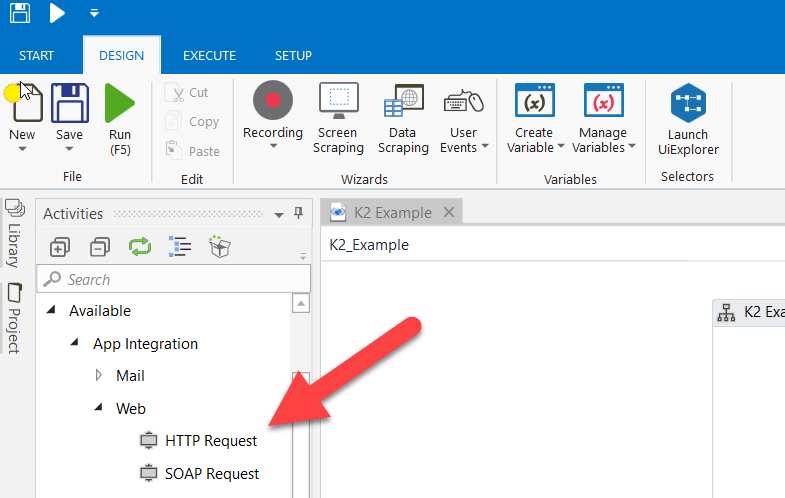
UiPath provides activities for working with REST-based services, including the K2 Workflow REST API which you can use to start and action K2 workflows from UiPath. To get started, make sure that UiPath Studio has the additional components installed to work with REST-based services. Once installed they can be found in the Activities library under Available > App Integration > Web > HTTP Request as pictured here:
If you do not see the App Integration section, you may need to click the Refresh button to force the Activities panel to reload the available wizards, or you may need to install the UiPath.Web.Activities package. To check to see if your installation of UiPath has the package installed, click the package icon on the activities panel and look for UiPath.Web.Activities in the list. If it isn’t there, you can search and install it from the following window:

You need the following UiPath activities to call the K2 Workflow REST API:
- Get Transaction Item – This allows you to retrieve a queue item that was added to the queue by K2 or some other system.
- Invoke Code – This activity allows you to use VB.NET string manipulation to create the request body that the K2 Workflow REST API expects to start or interact with a K2 workflow. Refer to K2 Workflow REST API for information on the format the JSON request body.
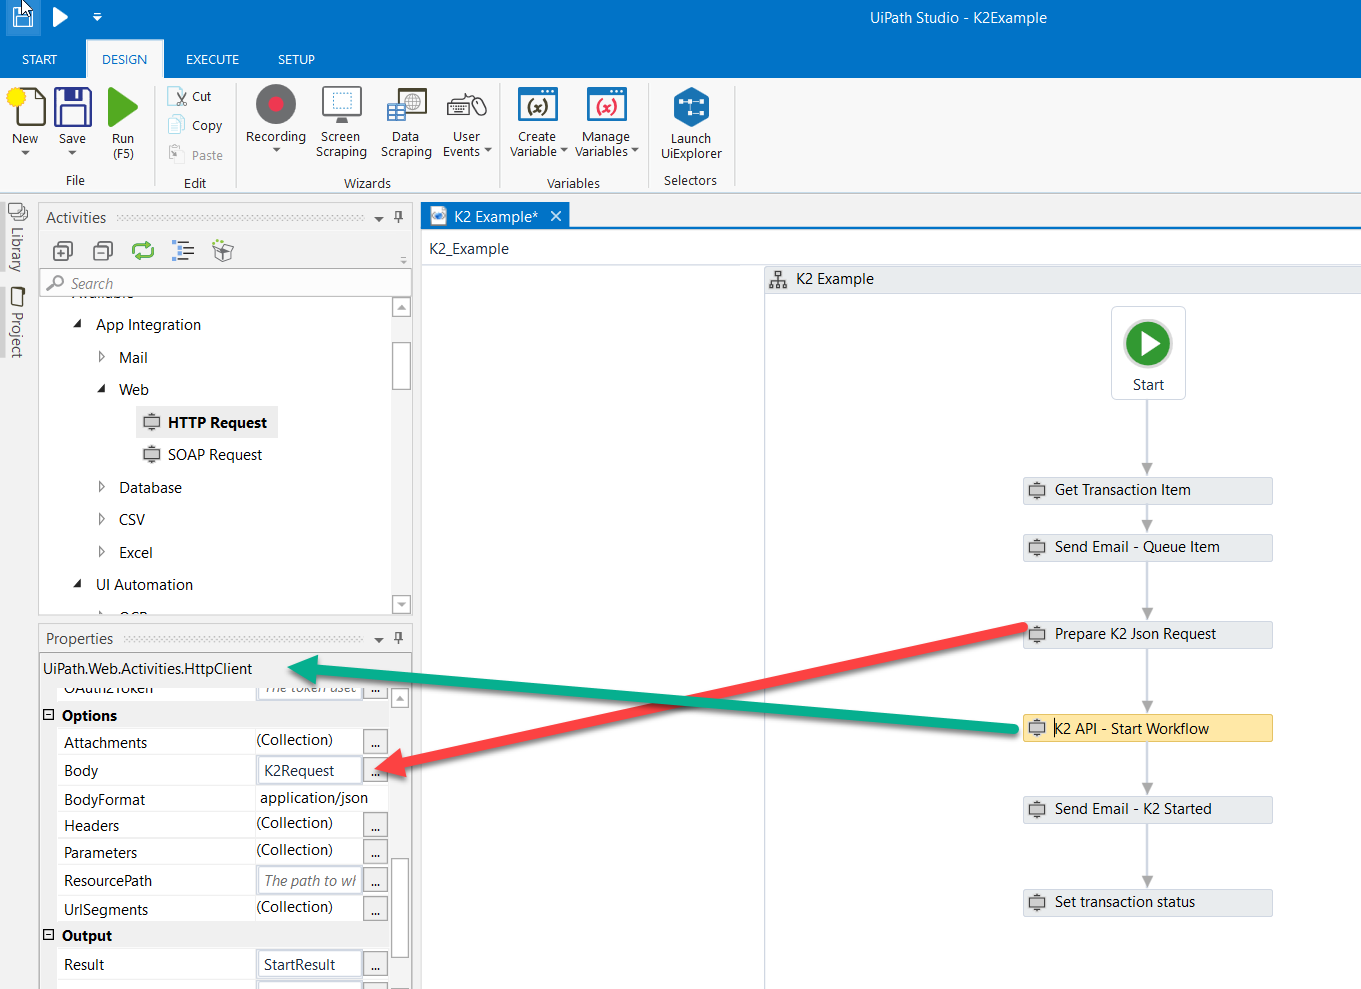
- HTTP Request – Launch a wizard when dropped onto the UiPath canvas that allows you to configure the K2 Workflow REST API call, specifying values such as the endpoint URL, request method type, the response type, and the authentication. Use the Simple HTTP authentication method.
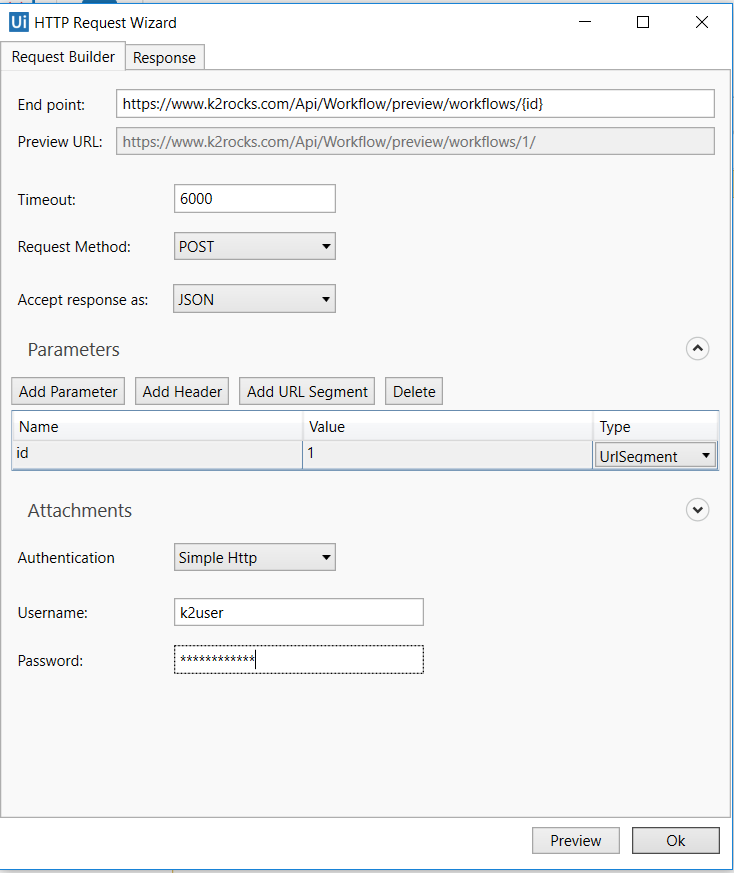
Once you configure this, HttpClient activity appears on the UiPath process canvas. Select the activity and, in the Properties panel, set the value of the body property to the UiPath variable where you stored the request body you created using the Invoke Code activity. In this example, the JSON request is contained in a UiPath variable called K2Request.
Once the K2 workflow is started, UiPath requires that you update the queue item transaction status so that future execution of the job doesn’t attempt to process the same queue item again.
The K2Example UiPath Process is provided for reference in the article download.
Additional Resources
Use the following resources to learn more about UiPath:
- You can view the demo UiPath orchestrator site at https://demo.uipath.com/account/login where you can sign up for a demo account.
- UiPath Orchestrator API guide
- The UiPath Queue API
- The UiPath Jobs API
