

How to use the Tree Control
KBS100028
PRODUCTObjective
This article is a brief overview on how to use the the tree control in K2 SmartForms.Before You Begin
This article assumes that you already have a pair of SmartObjects that you will be using for the tree control. One of these SmartObjects should have a column that is used to reference the other.How-to Steps
The list control is relatively simple to set up. The basic outcome should look like this:
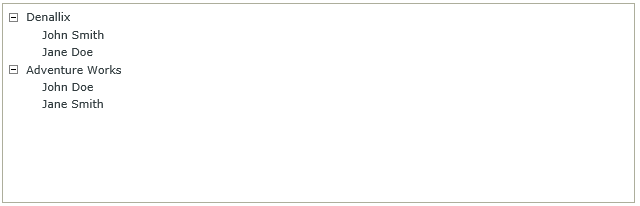
To start you should know which SmartObject will be the parent and which will be the child. Additionally, you should know which value on the child SmartObject will associate with the parent SmartObject.
Company:

User:

In this case, the Company SmartObject will be the parent and the User SmartObject will be the child. On the User SmartObject, the CompanyID property will be used to refer to the Company SmartObject.
Once this is done, you can start to look at the actual settings for the control itself.
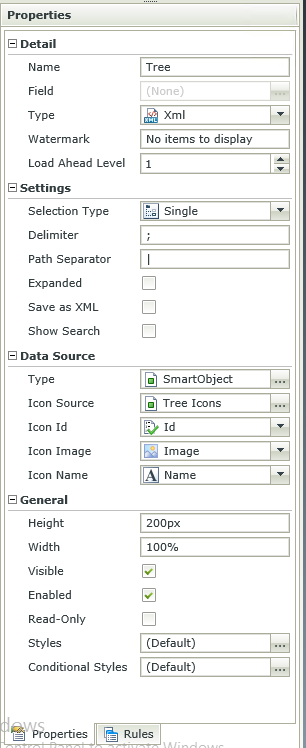
The first set of properties, the Detail tab, is rather self explanatory and is shared across most SmartObjects. The Name is the name used by K2 to identify the control on the back end and in the Context browser. The Field is the field for any SmartObject that it may be associated with. The Type is how the data is stored, either as XML, a Multivalue, or text. The Watermark is the text that displays when the control is empty. The Load Ahead Level is how many levels deep the control loads at a time, utilized to increase the performance of the control.
The second set of properties, the Settings tab, is more specific to this control. The Selection Type allows you to choose whether multiple values can be selected at once or not. The Delimiter is how the values that are selected, are separated in a return string. The Path Separator is similar to the Delimiter, but is used to differentiate the different paths to the selections. Expanded allows for all the categories to be expanded by default, though this may negatively affect performance. Save as XML allows the user to save the return values as XML. Show Search enables a search bar at the top of the control.
The Data Source properties are the most important part of the control, configuring how it is actually populated. The Icon options allow you to change how the control looks. However, these options do not have any different choices out of the box and would have to be created separately. The Data Source Type is where you set the actual SmartObjects from which the data comes.
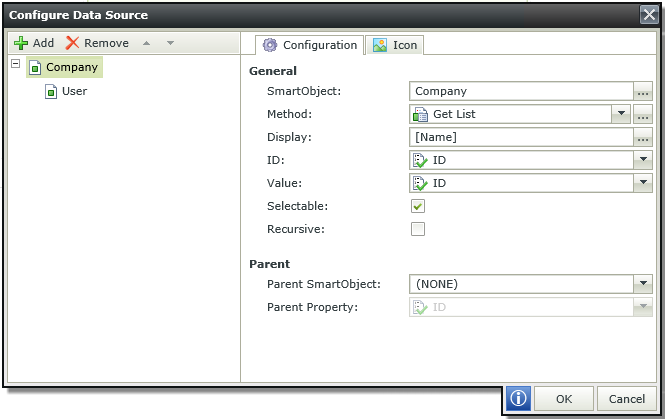
The first SmartObject that you will configure in the window is the parent SmartObject. As mentioned above, the parent in this example is the Company SmartObject. You start the configuration by selecting the actual SmartObject from the SmartObject Explorer. From there, you will choose the method that the SmartObject will use to populate, like in any list control. Afterwards, you will select the Display, the ID and the Value to pick how the information is displayed and returned. The Parent information isn't needed as this SmartObject is "at the top".

When you configure the child SmartObject, most of the settings are the same. The only difference is in the Parent category. You will want to select the parent SmartObject (Company in this example), and the property on the child that will equate to the ID for the parent. In this case, the CompanyID column that was in the User SmartObject is used for the ID in the Company SmartObject.
The final tab of the properties, General, will allow you to change the general layout of the control and how the text looks. This is also similar to other controls and shouldn't cause any complications.
One thing to note is that the association between the two SmartObjects should be based on the list results of the SmartObjects. Using the results of one SmartObject as an input for the other tends not to work, such as attempting to use the Ad Groups SmartObject to get a list of groups that you then attempt to pass into the AD Users GetUsersForGroup method.
Read more about Tree Controls here.
