How to create the Default HTTP Request Header for the WCF Endpoint service
kbt131405
PRODUCTObjective
To provide more details on the documentation we have regarding the endpoints WCF service as well as help provide more info on how to create the Default HTTP Request Headers https://help.k2.com/onlinehelp/k2appit/userguide/1.5_update3/default.htm#servicebrokers/endpoints/endpoints_wcf.htmBefore You Begin
You need to know how the Endpoints WCF service works and how to configure and register a WCF service.How-to Steps
We will be testing using the K2 services Content "WCF.svc" on IIS manager.
Go to IIS Manager
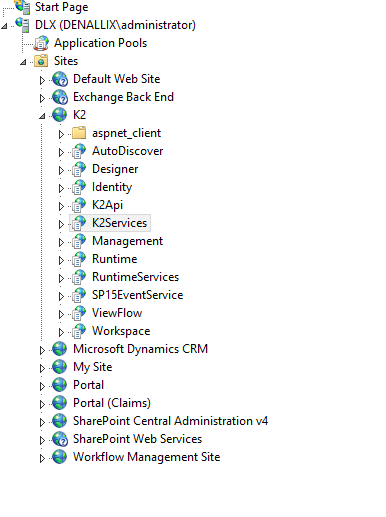
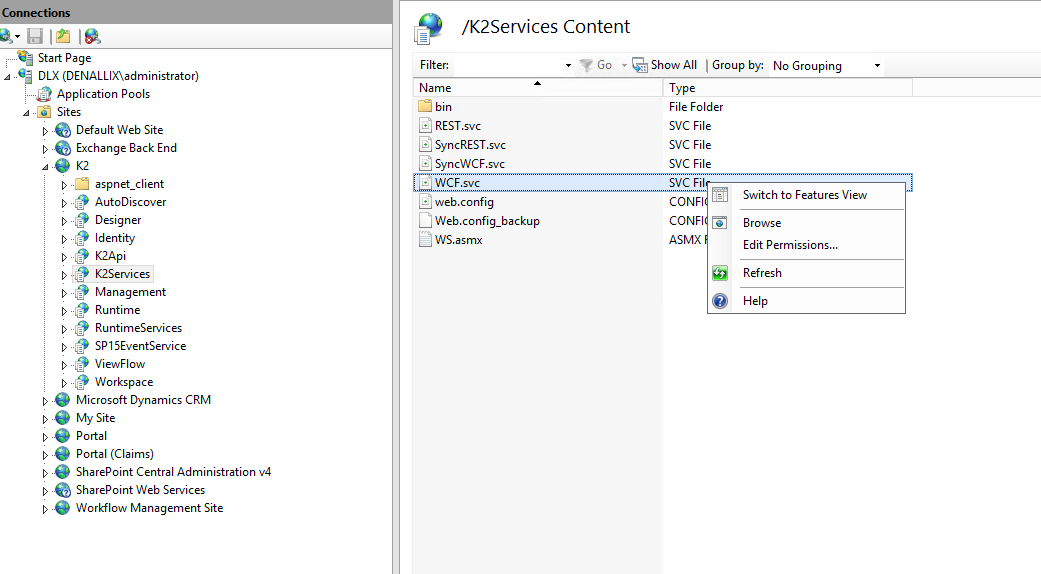
1. Click on K2 services, then on the right click on “Content View”

2. Right click on the WCF.svc and click browse.
3. On the browser click the “svcutil. Exe” url
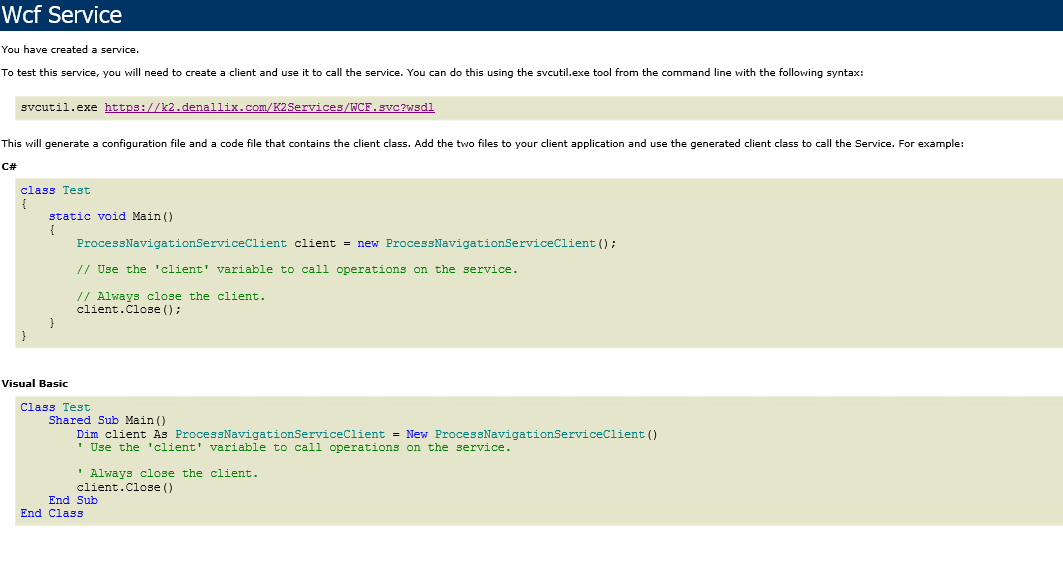
4. On the pop up, scroll down and copy the “soap :address location= (https://k2.denallix.com/K2Services/WCF.svc/Core)"

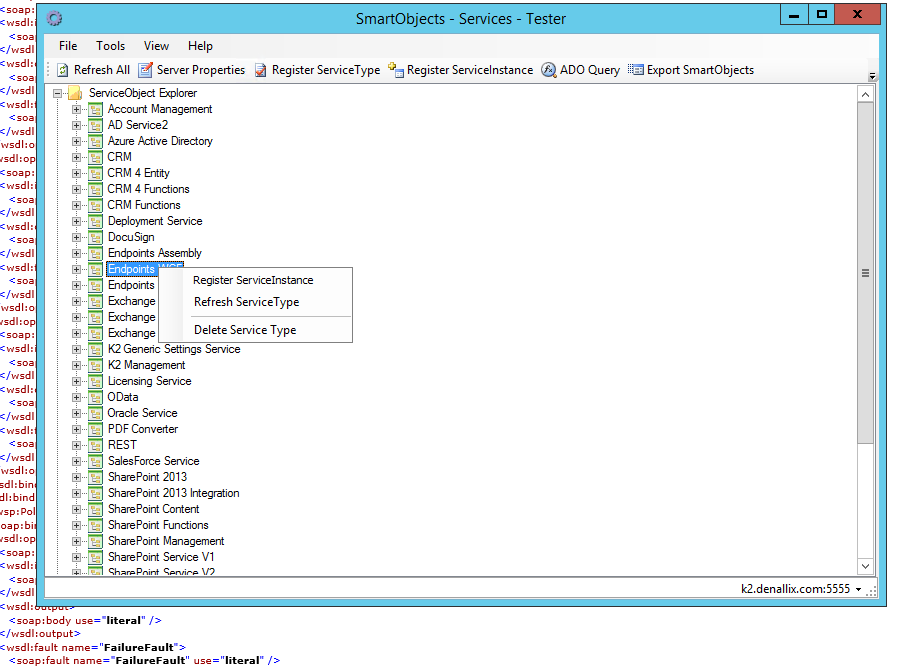
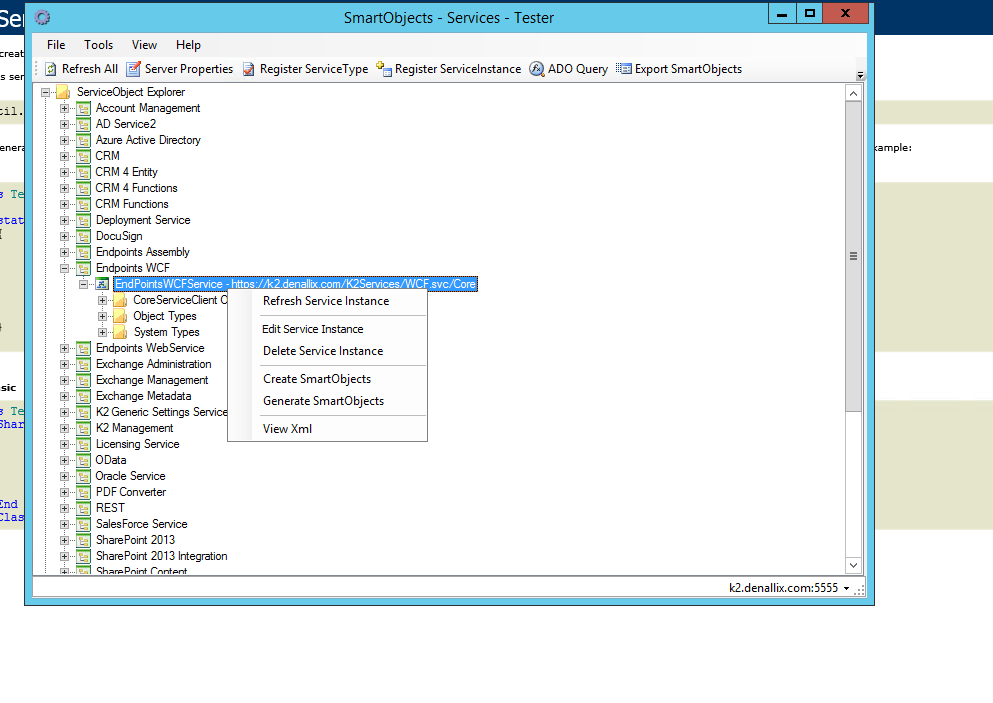
5. Open the smartobject tester tool, right click the endpoints WCF service. Select Register Service instance
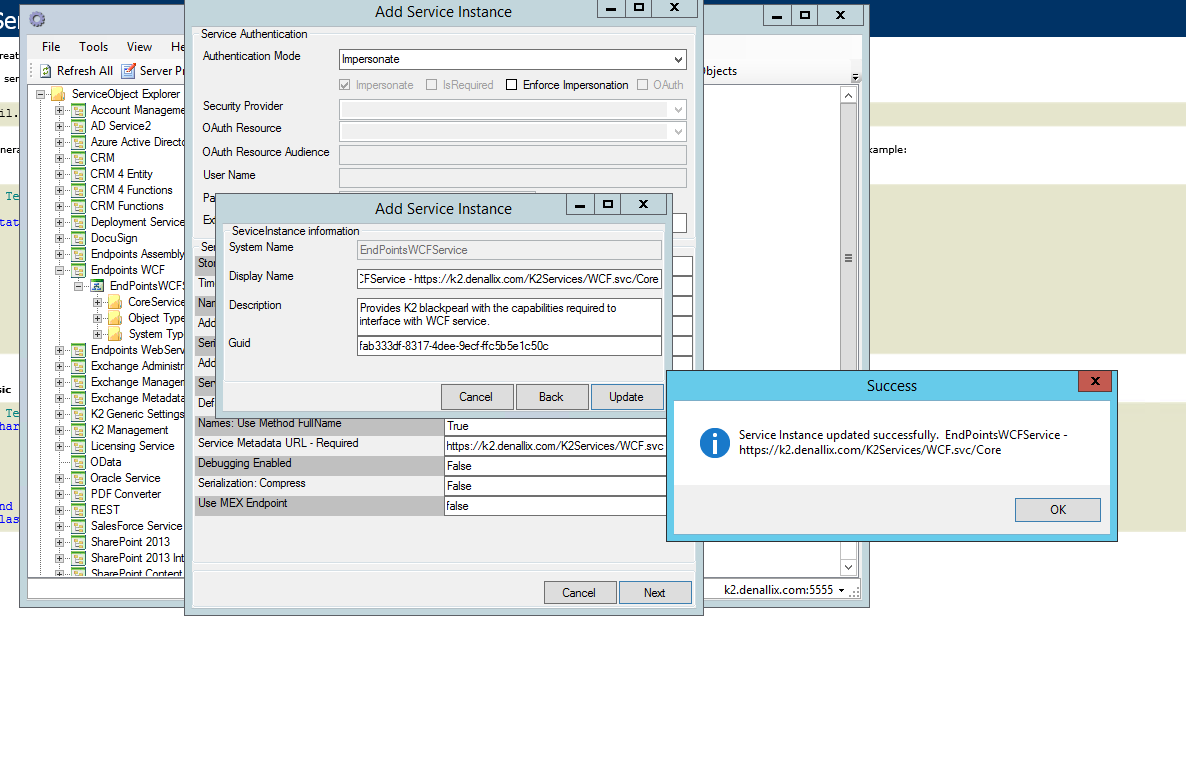
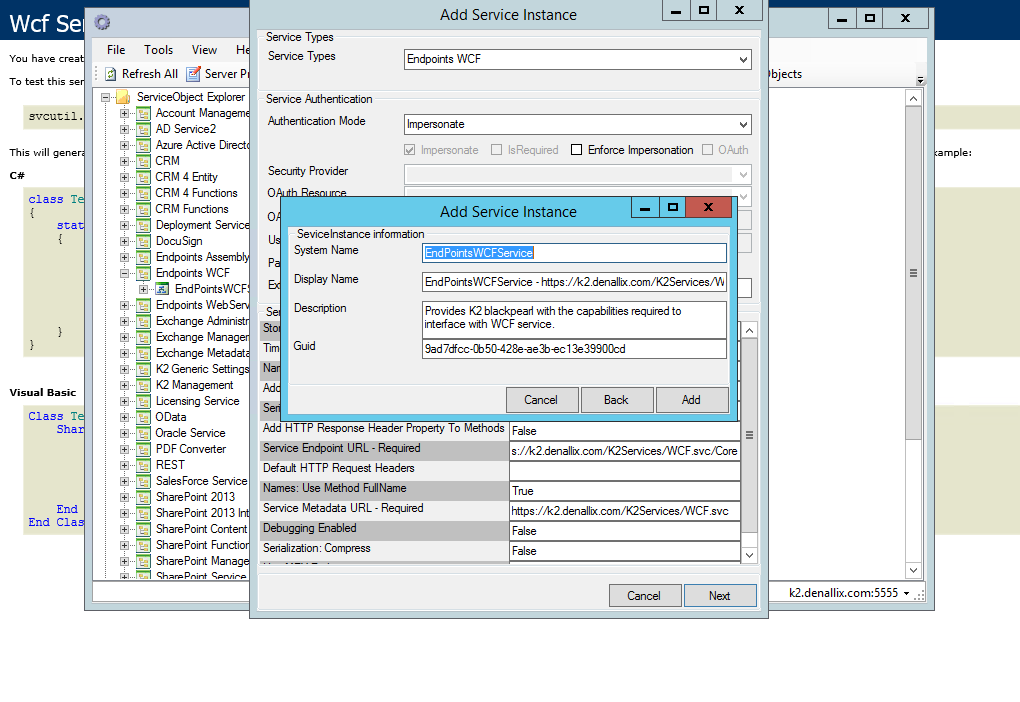
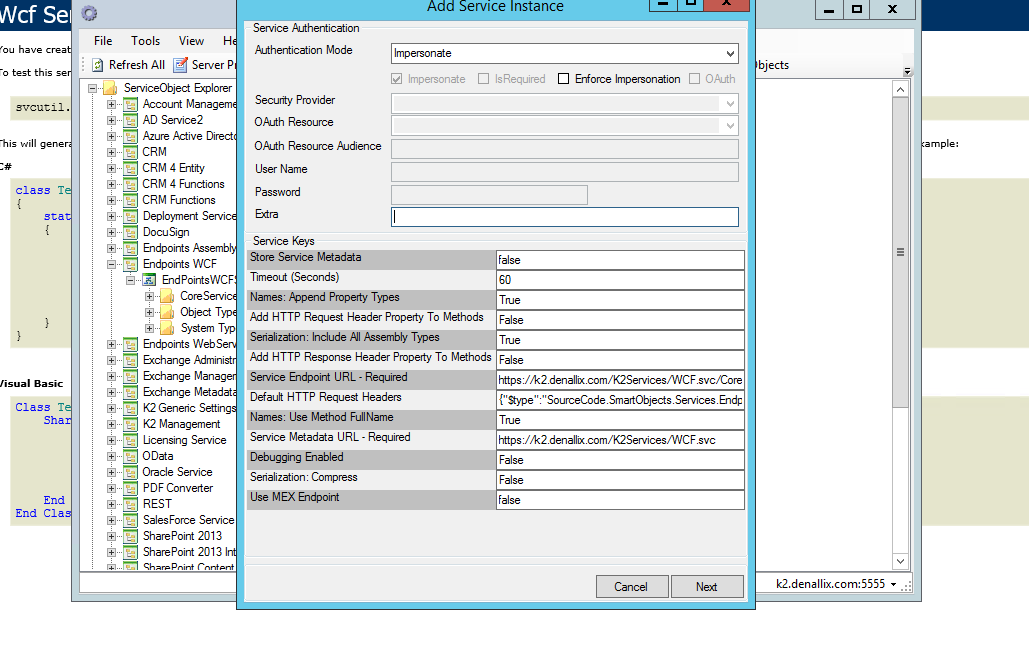
6. Paste this URL "https://k2.denallix.com/K2Services/WCF.svc/Core" on the Service Endpoint URL

7. On the Service Metadata URL paste the "https://k2.denallix.com/K2Services/WCF.svc". (This is still on the service instance registration page)

8. Then you can register the services and click “Add”
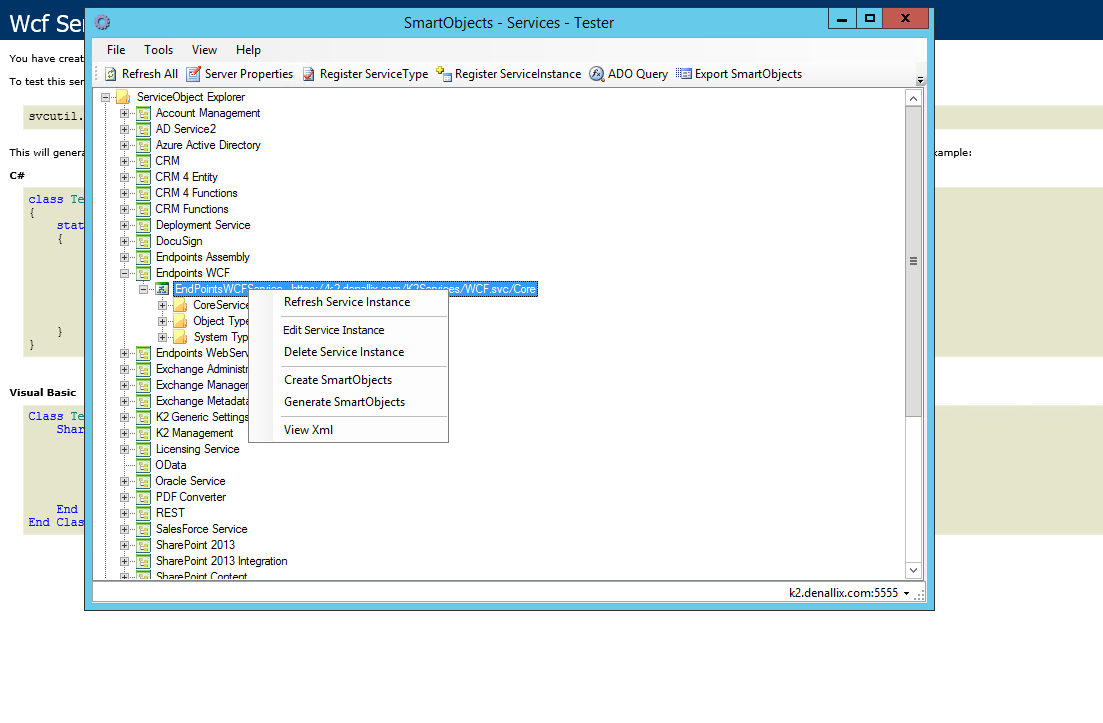
9. After adding you need to CreateGenerate smartobjects from the newly created Endpoints service instance
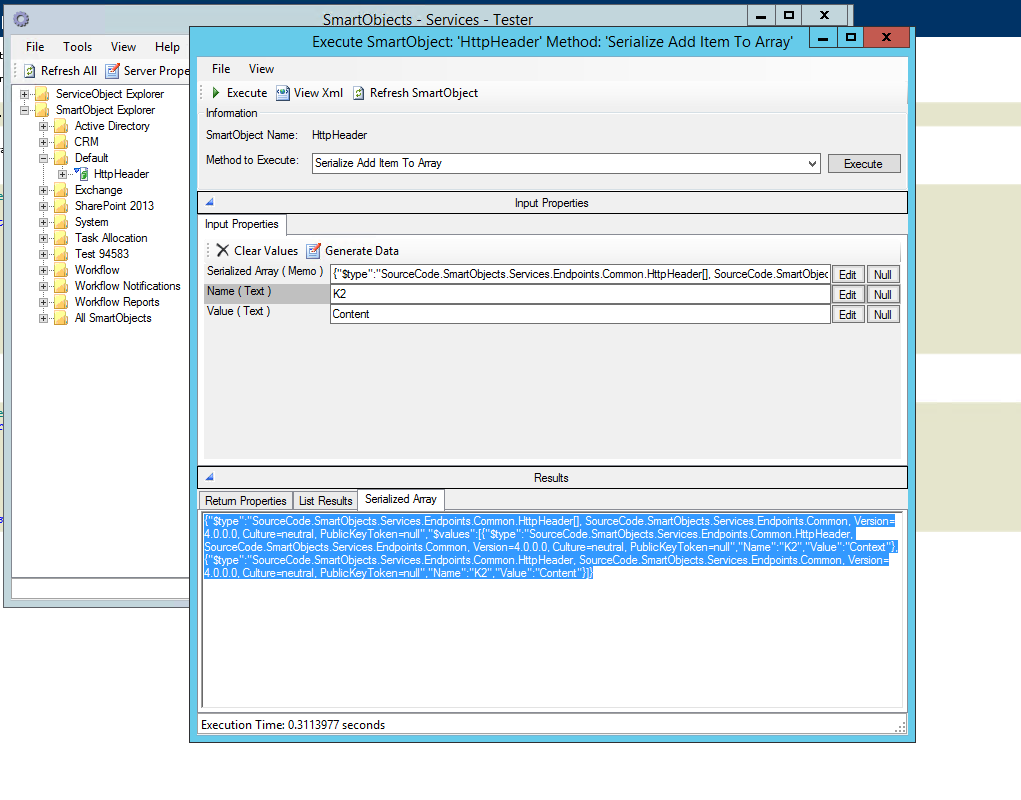
10. After creating the smartobjects, you need to execute the smartobjects and run the method “Serialize item to Array” give your own “Name” and “Value” eg K2 and Context.
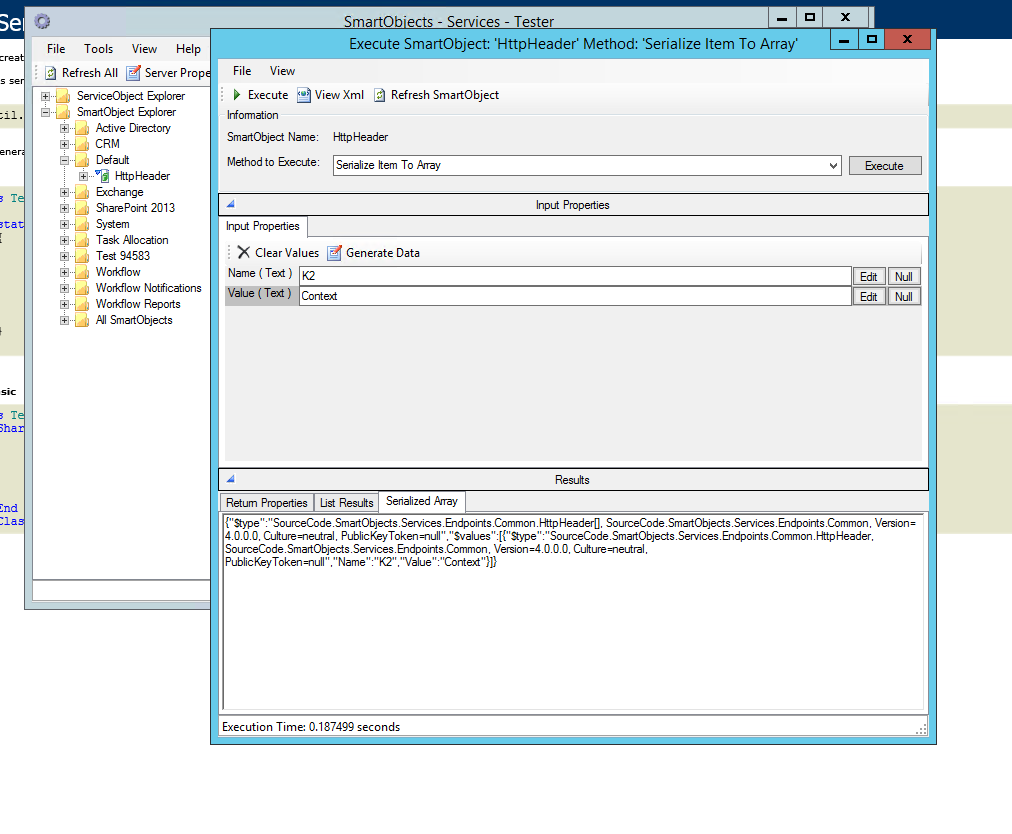
11. Copy the serialized array text and paste it on the method “Serialize Add item to array”. E.g "Serialized Array ()", "Name (K2)", "Value (Content)",
12. Then you would need to go back to the WCF service you registered above and edit the Service instance
13. On the Default HTTP Request headers paste the Array you, serialized above.
14. Click next then update the service instance. You have just created the Default HTTP Request Header. I also have a document that outlines the steps in more detail with pictures and examples.