How to: Add HTML and Custom Styling to an Email in K2 Five Designer
kbt148879
PRODUCTObjective
Please note this KB was written before the HTML Mode feature was added to the Workflow Designer. It is recommended if you are on a version of K2 that has the HTML mode feature, K2 recommends that we use this instead of the below detailed steps:
On Premise K2 Five:
K2 Cloud:
There will be instances where some additional customization is needed on the Send Email events and Email Notifications for client events. Or perhaps you might also be looking to utilize an Email template with organization specific images and styling. This article is intended to give some guidelines on how to implement more customization with HTML in your email events on the new HTML 5 Designer included in K2 Five.
Before You Begin
Currently there is no available feature to directly edit the HTML within the email text editor. This is currently a planned feature for future release in the product. For the time being we have two routes to get our desired HTML and its customization.
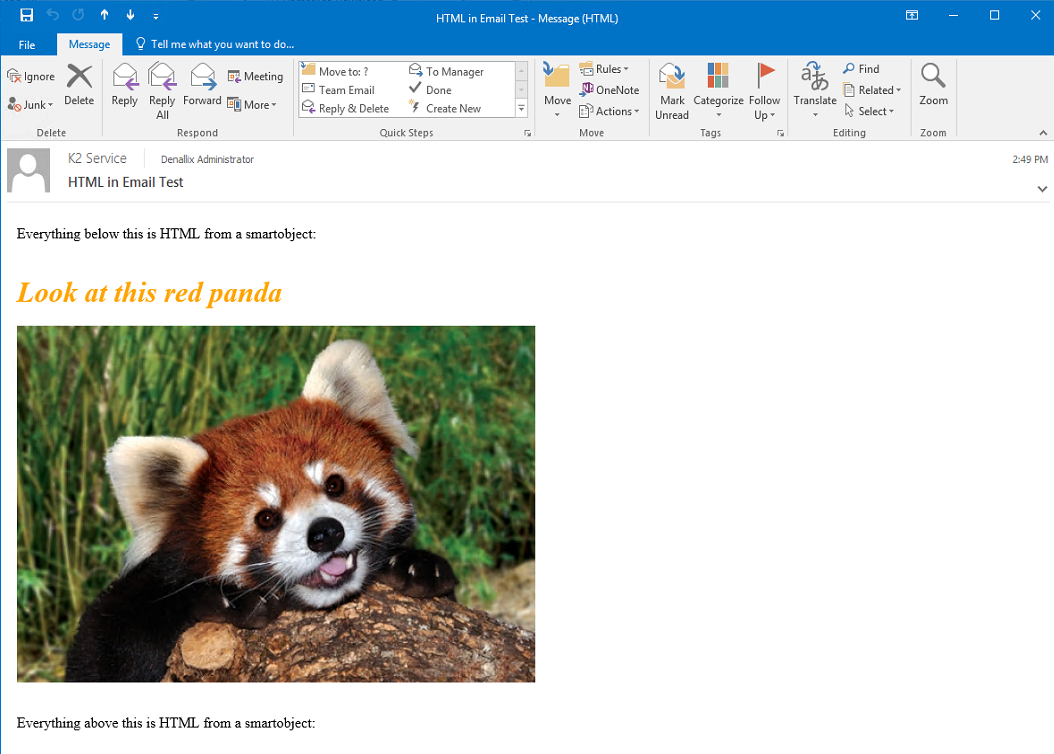
1. Copy already rendered HTML directly into the Email Body section of the Email.
2. Pull HTML snippets from a SmartObject call into the Email body section of the Email.
Additional notes:
It should be noted that it might be necessary to do a combination of the above two, to get the proper design you desire. For example, if using images contained within the email template, be careful when copying HTML from an outlook email as the source of the image is not directly within the HTML. You might need to use the SmartObject method to call in the image that would be sourced elsewhere such as a third party image hosting service (e.g. Imgur, DropBox, or TinyPic).
Finally, please keep in mind that the translation of HTML and the styling provided will be handled differently through various email clients (Outlook, Gmail, etc.), so it is quite possible the exact styling in the HTML will not be consistent across all platforms.
How-to Steps
Example 1: Copy/Pasting Rendered HTML
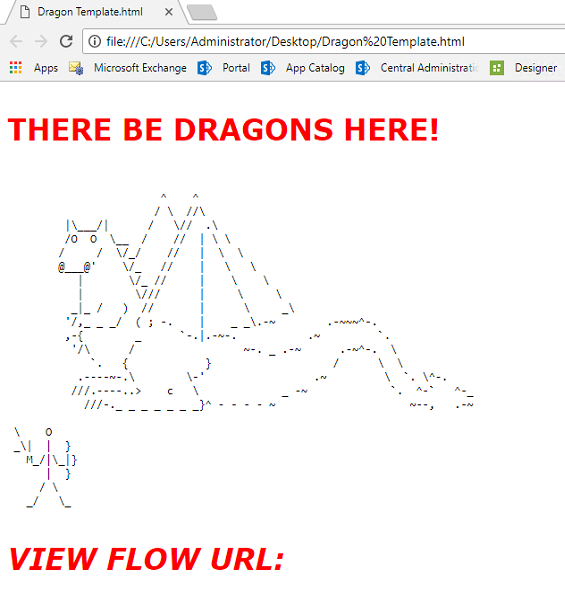
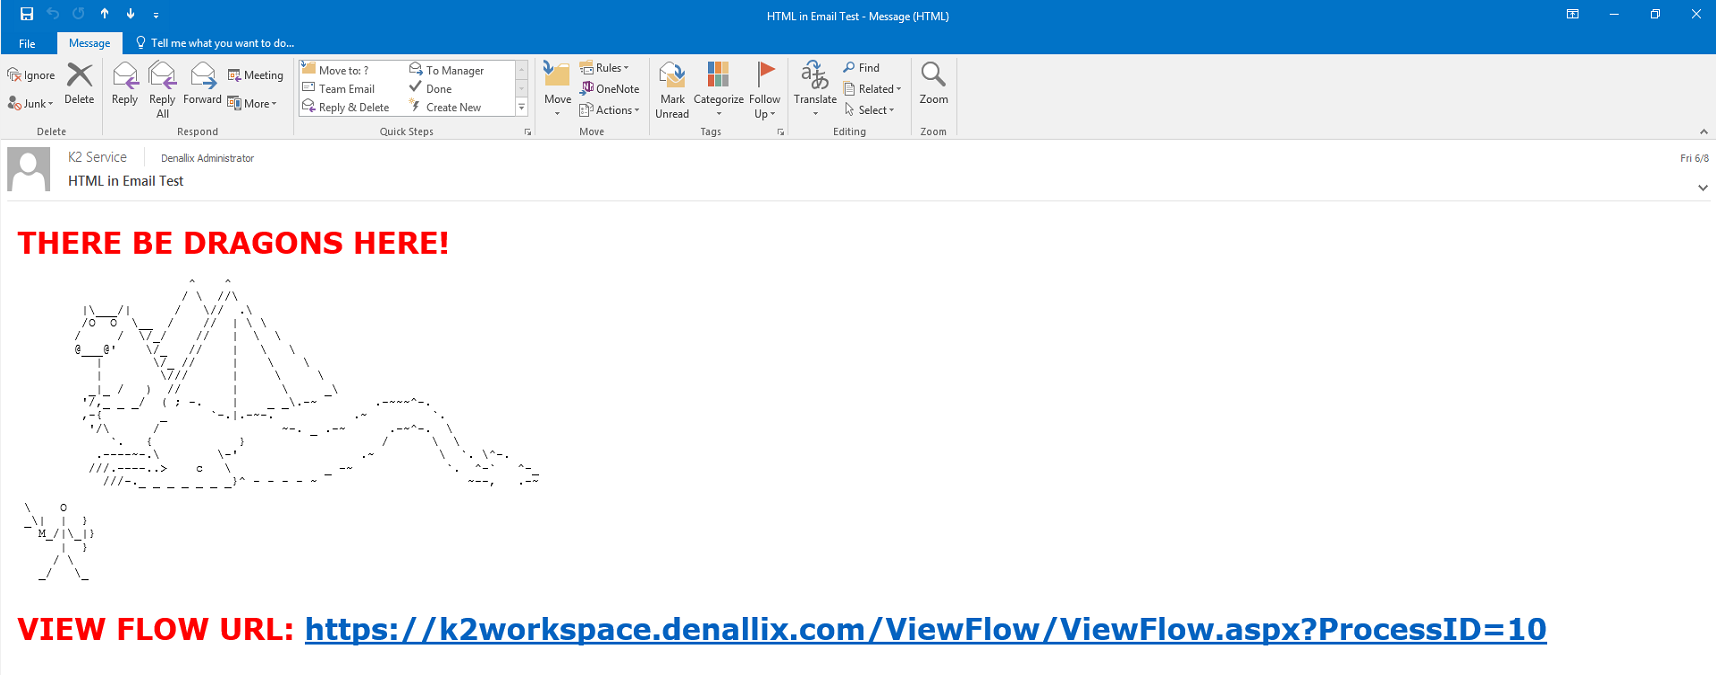
1. Pull up either an already rendered Email of your desired template, or open a browser that is displaying an HTML document you wish to put into the email body for a K2 workflow. For example, let's say I have created a HTML document that I want to add to my email. I have opened it within Google Chrome and it is therefore rendered by the browser:
2. Copy the entirety of the the HTML by using your mouse cursor or the Ctrl + a keyboard shortcut.
3. Paste it directly into the body of the email text editor. If needed you can open the text editor to get a better view of the HTML you just pasted.
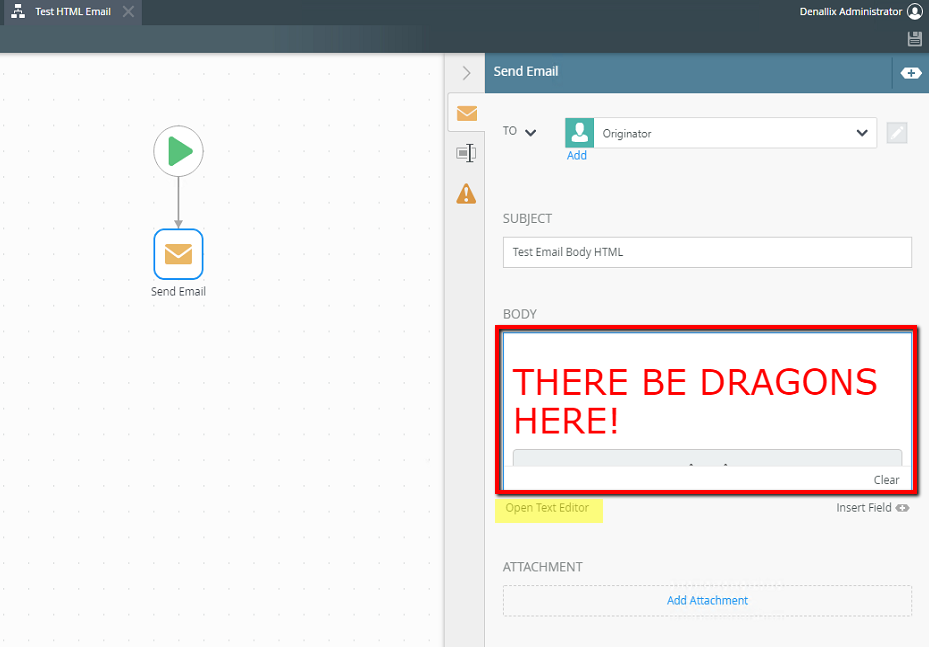
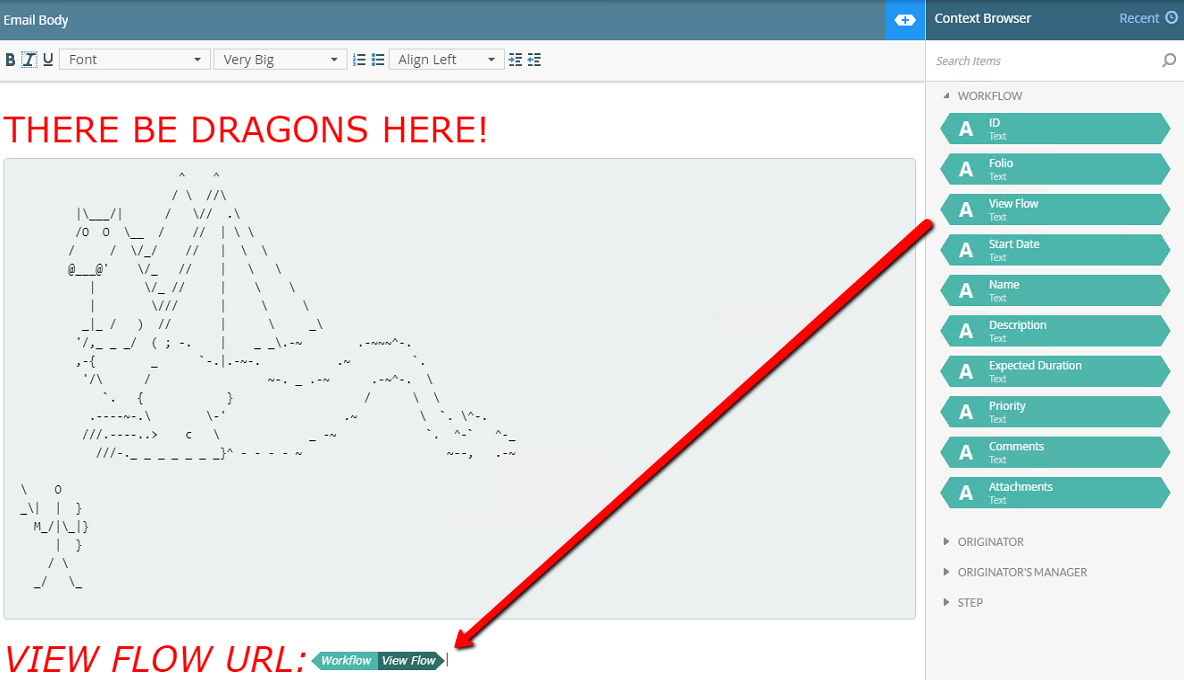
4. In this example I also want to add the View Flow URL to my email body. To do this I grab this from the context browser and drag it into my desired spot on the editor:
5. Deploy your workflow and test. You should see the HTML show in an email sent by the workflow.
Example 2: Using a SmartObject call to Pull in HTML
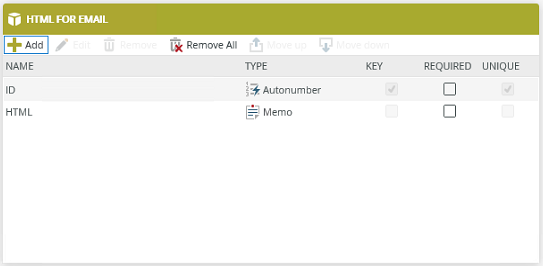
1. Create a new SmartObject or utilize an existing one. In this example I used a SmartBox SmartObject with a Memo Property to hold my HTML.
2. Copy the HTML source code you wish to put into the email. Using the create method on the SmartObject, create an entry that holds your HTML in the memo field we created above. I used a view tied to this SmartObject that takes the HTML from a text area and puts it into the SmartObject. You can also use the SmartObject Tester tool to accomplish the same.

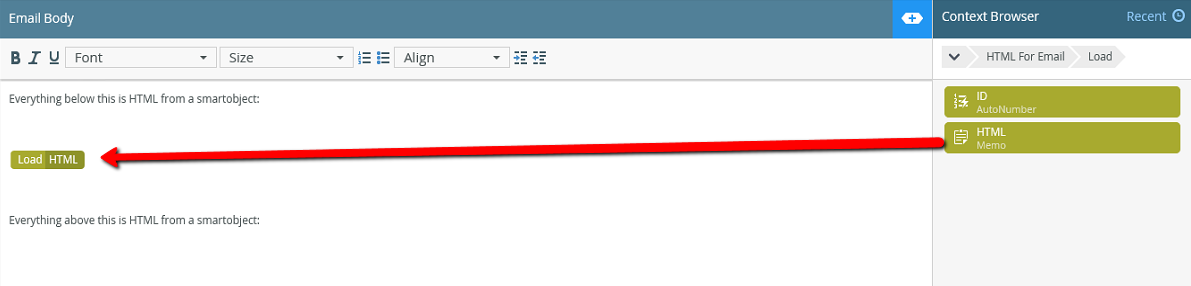
3. Open the workflow designer and go to the desired email event.
4. Click on the Open Text Editor link.
5. Go to Context browser and select the Load method from your SmartObject and supply the ID that relates to the HTML we just added into the SmartObject for step 2.
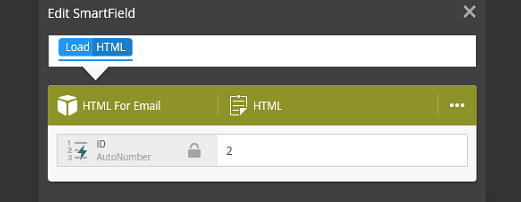
6. Supply the ID for the relevant HTML that you want to drag in. In this case my ID was 2 for the HTML I added in Step 2.
7. Deploy your workflow and test.