

How To: Configure Okta to Log In to K2 Sites
KB002433
PRODUCTTAGS
Summary
This article provides details about the ability for K2 Cloud customers to use Microsoft Azure Active Directory (AAD) when AAD is federated to Okta for authentication. In this scenario, identities must be stored in AAD for every user expected to use K2 Cloud sites and services, including K2 Management, K2 Designer, K2 Workspace, and K2 mobile apps.
Authentication Flow
Microsoft Azure AD (AAD) is the sole Identity Provider (IdP) within K2 Cloud and users are expected to be presented to K2 for authorization following an authentication pipeline by AAD. In some circumstances, you may want to delegate the final authentication of a user to a system outside of AAD, in this case, Okta, to serve as the location where identity is validated. Users that are in an environment configured for this type of federated authentication use this authentication flow:
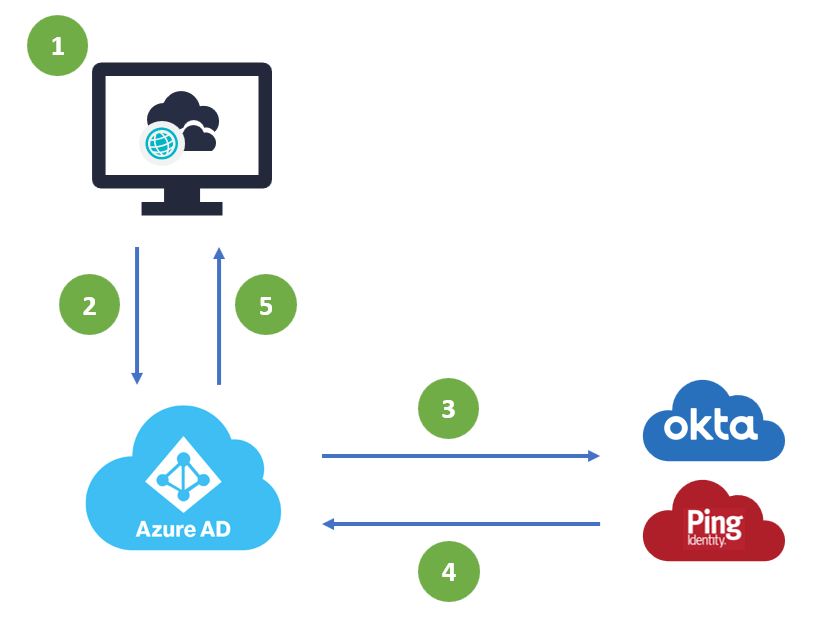
- A user accesses K2 Cloud and is prompted for authentication
- K2 Cloud redirects the user to AAD for authentication
- Once the user presents login details (username) they are directed to a federated Identity Provider for authentication
- Once the user is authenticated, the request is returned to AAD
- The authenticated user is matched to an AAD identity which is then passed to K2 Cloud for authorization
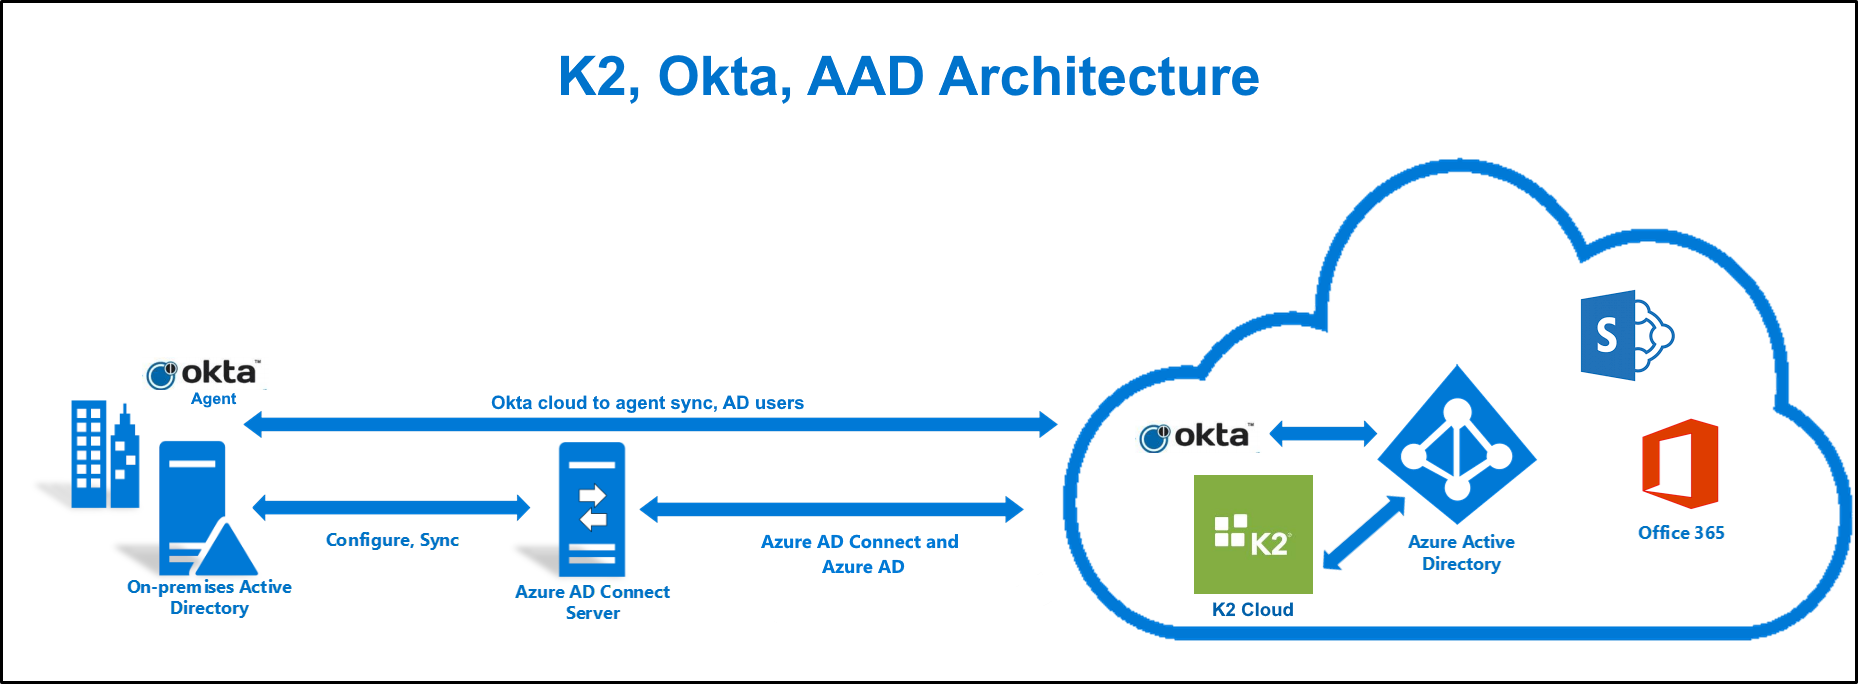
Architectural Overview
Use the following diagram to understand how the technologies and services described in this article work together. Image adapted from Hybrid Identity Required Ports and Protocols
Steps
K2 does not warrant or provide troubleshooting support of the federation between AAD and Okta. The details provided below provide a high-level overview of the steps used to configure a reference deployment but are not meant to be used by customers as the definitive guide on how federation between AAD and Okta should be configured in every situation. Please refer to the set of links at the end of this article for additional resources from Microsoft and Okta.
The scenario assumes you have the following pre-requisites in place before starting:
- You have synchronized your on-premises Active Directory to Azure Active Directory (using Microsoft Azure Active Directory Connect)
- You have an Okta account
- You are an administrator for your Okta and Azure Active Directory tenancies
- You are able to install the Okta agent to set up a link between Active Directory and Okta
- You have setup K2 for SharePoint to integrate with SharePoint Online (only required if you need K2 integration with SharePoint Online)
By configuring Okta as a federated authentication provider, you can use Okta-based accounts, synchronized from an on-premises Active Directory, to access K2 Cloud behind AAD authentication.
If you have an environment or requirements that do not fit the scenario outlined in this article, create a Remote Services request to determine if K2 can help.
Step 1: Install and Configure the Okta Active Directory Agent
Use this step to sync your Active Directory users to Okta using the Okta agent.
- Sign in to Okta
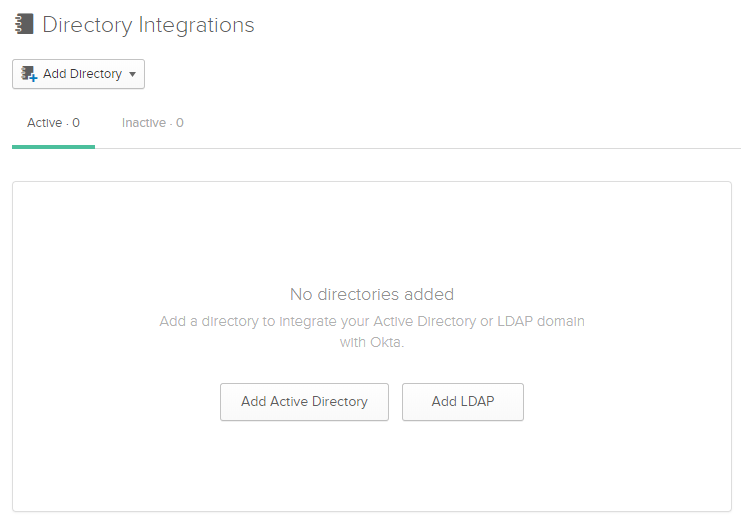
- Click the Directory menu, then click Directories. Click the Add Active Directory button.
- Read about the agent architecture and, when you're ready, click the Set Up Active Directory button.
- Click Download Agent.
- Download and run the agent to install it.
- On the Select AD Domain step, specify your domain (for example, denallix.com).
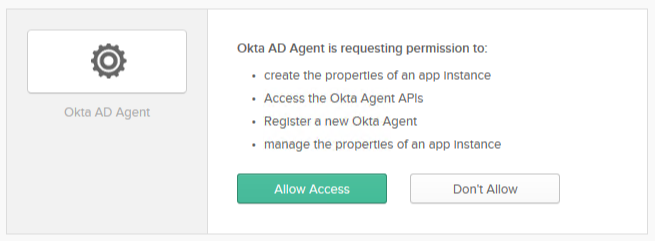
- Complete the setup of the Okta AD Agent, logging into Okta and trusting it to synchronize your Active Directory.
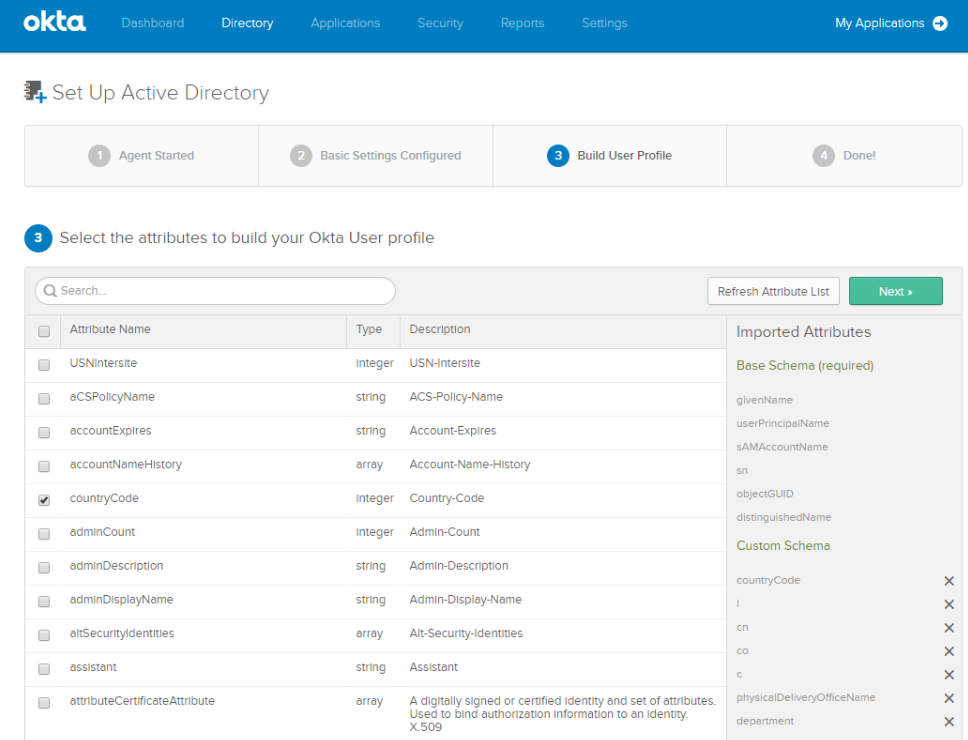
- Browse to your Okta tenancy and connect an Organizational Unit (OU) for Okta to begin syncing. You also have the option to include more AD attributes than required by Okta, such as countryCode shown here.
- Once finished configuring attributes, click Next.
- Select the Active Directory that you just configured and click the Settings tab.
- Make sure that the Enable delegated authentication to Active Directory option is checked.
Step 2: Add the Microsoft Office 365 Application to Okta
Use this step to add the Microsoft Office 365 application to Okta.
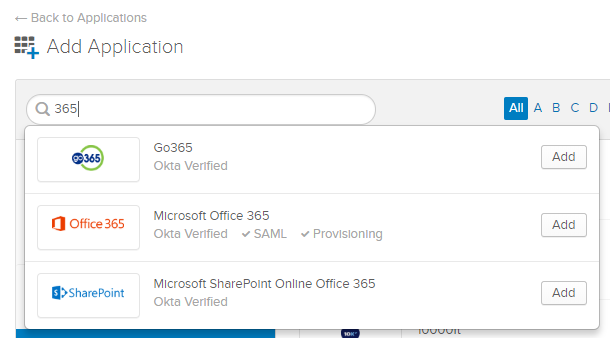
- Click the Applications menu.
- Click Add Application.
- Search for 365 using the search box, and then click the Add button for Microsoft Office 365.
- Specify your Microsoft Tenant Name and Your Office 365 company domain, for example, denallix.onmicrosoft.com and denallix.com.
- Choose which Office 365 apps (links) you want to create, and then click Next.
- Specify WS-Federation for the sign on method and the Let Okta configure WS-Federation automatically for me option.
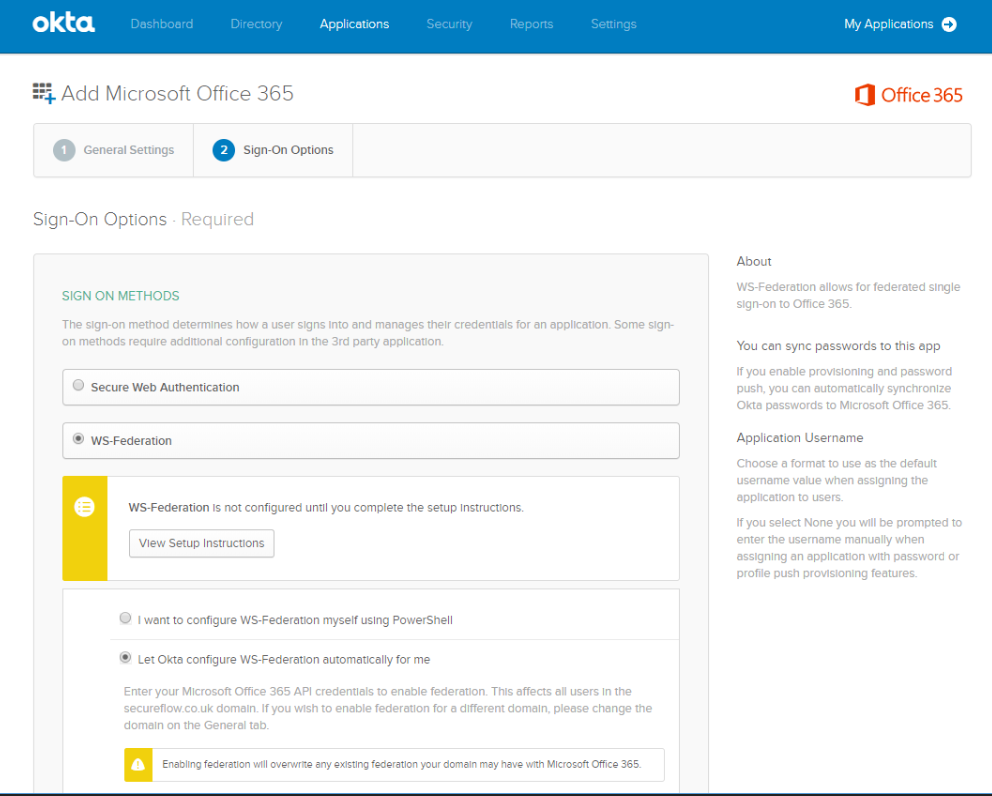
- Specify your Azure AD global tenant admin username and password. You can optionally specify a page to redirect to after login by setting a Default Relay State.
- Check the Allow administrator to consent for Advanced API access option.
- Click the Authenticate with Microsoft Office 365 button.
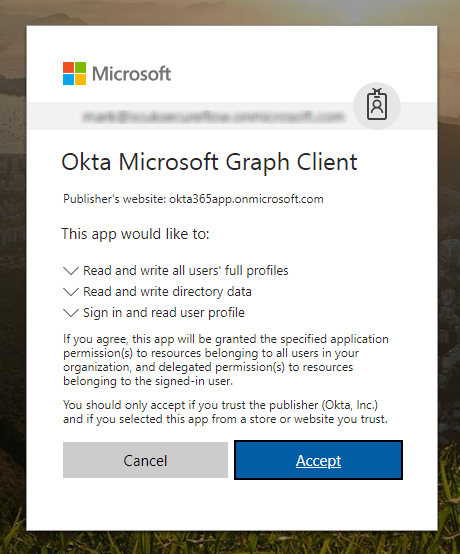
- Log in using your tenant admin credentials and then click Accept on the Okta Microsoft Graph Client prompt to trust Okta's access to your Azure Active Directory.
- Click the Done button on the Sign-On Options page in Okta.
To start the sync immediately, click the Directories menu, then Directory Integrations, and click Import Now.
Step 3: Assign people to the Microsoft Office 365 Okta Application
Use this step to configure who can log in through Okta using their Azure AD account.
- On Okta's configuration page for the Microsoft Office 365 application, click the Assignments tab.
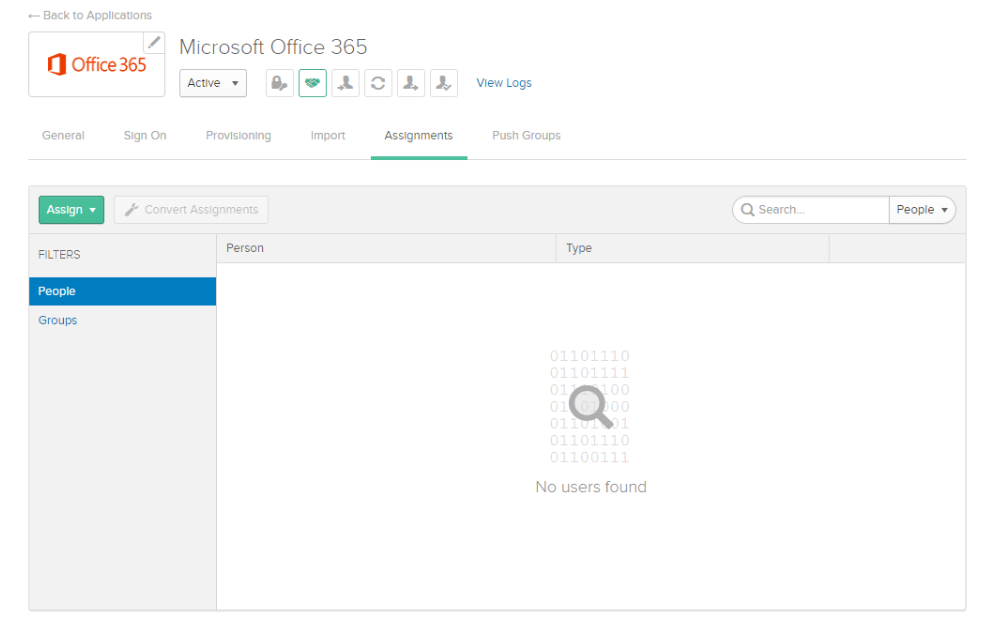
- Notice that there are no users. Go to Directory > Directory Integrations and click Import Now.
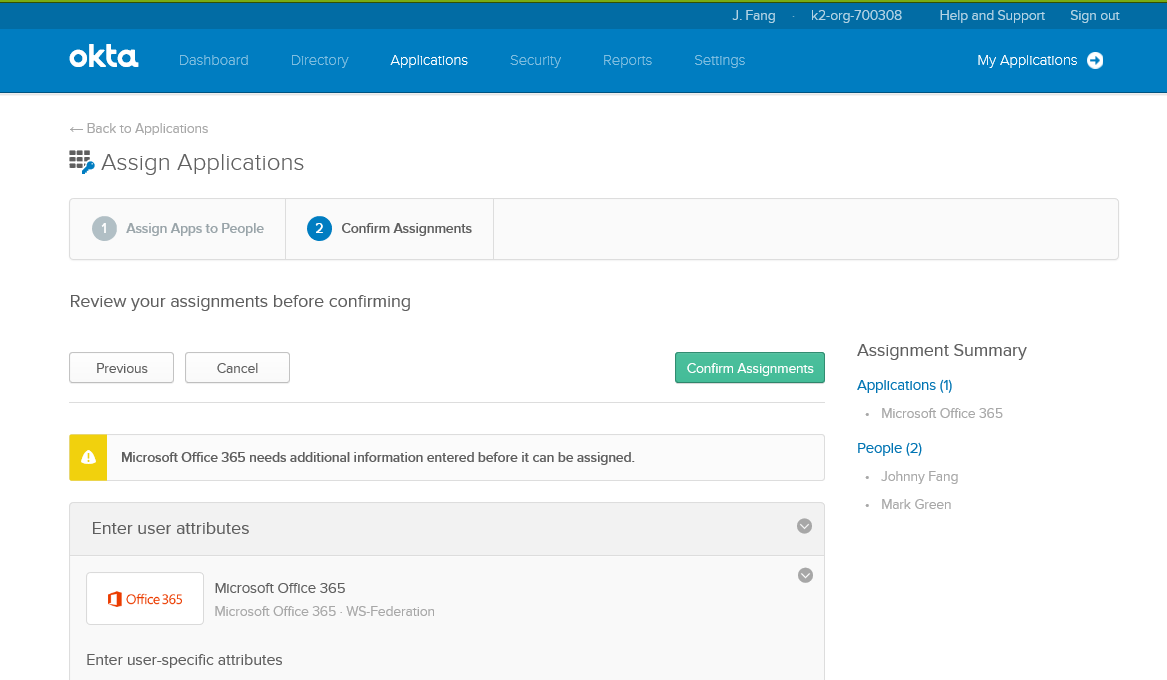
- After it's finished importing, go back to the Assign page and assign the Office 365 application to your Okta log in.
- In the Applications section, click Assign Applications and assign the application to the users.
Step 4: Log In to a K2 Site using an Okta Account
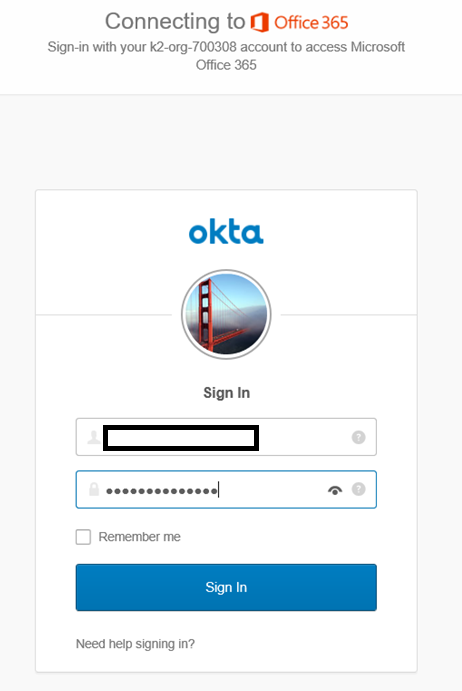
You can log in to a K2 site using your Okta credentials.
- Select the AAD provider from the login page.
- Specify your username and password and click Sign In.
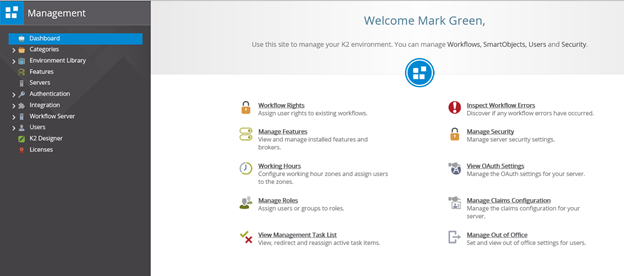
- Your page opens and you can work with or design K2 objects. Shown here is the K2 Management dashboard.
Additional Resources
- Authentication and Authorization in K2
- Microsoft Office 365 Deployment Guide (Okta)
- Azure AD federation compatibility list (Microsoft)
- Federated identity (Wikipedia)
