

Using the K2 Workflow Connector in Microsoft Power Automate
KB002743
PRODUCT
You can call the K2 Workflow REST API from Microsoft Power Automate to build custom flows that take advantage of both platforms. Microsoft Power Automate provides triggers from and connections to Microsoft 365 applications and services. Combining those with K2 workflows allows you to, for example, post a message to your Microsoft Teams group, or start a workflow when a SharePoint list item is created, or redirect a K2 task when an email arrives in an Outlook folder.
Use this article to learn how to create a connection from Microsoft Power Automate to the K2 Workflow REST API using the standard K2 Workflow connection, which uses Basic (static) Authentication. At the end of this article, there is a list of available workflow actions defined by the connector to help you understand the workflow actions you can use when integrating with Microsoft Power Automate, and links to How-To articles describing different integration scenarios.
Use Basic Authentication when you want to test with static credentials, such as for a temporary, proof-of-concept exercise.
Prerequisites
To add a connection from Microsoft Power Automate to K2 and access the K2 workflow actions, you must:
- Have an active Microsoft 365 subscription
- Enable the Workflow REST API in K2 Management site. See Configuring the Workflow REST API for more information
- In February 2019, Microsoft changed Custom Connectors in MS Flow from a Standard Feature to a Premium Feature, but this change was not yet enforced. As of 31 January 2020, this requirement is enforced, which means you will need a Premium Microsoft subscription to use the custom K2 Workflow connection.
Add the Microsoft Power Automate K2 Workflow Connection
Use the following steps to add the K2 Workflow connection:
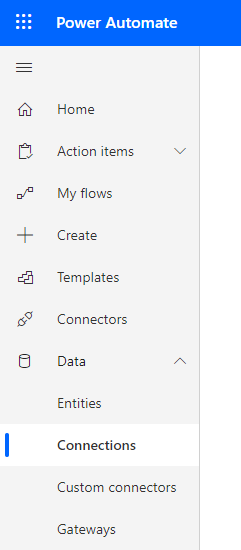
- In Microsoft Power Automate expand Data and select Connections
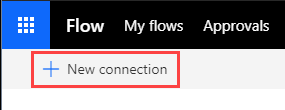
- Select New connection
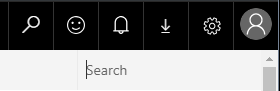
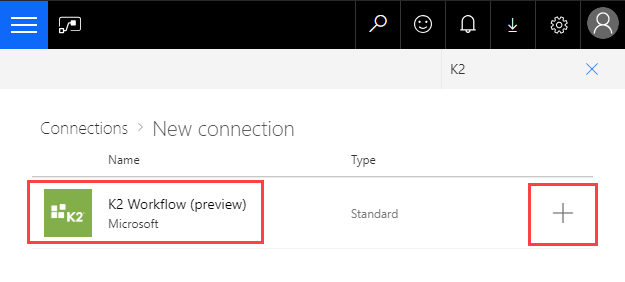
- In the Search box type K2
- Select the K2 Workflow connection and click add (plus sign)
- Specify your K2 username, password, and K2 URL
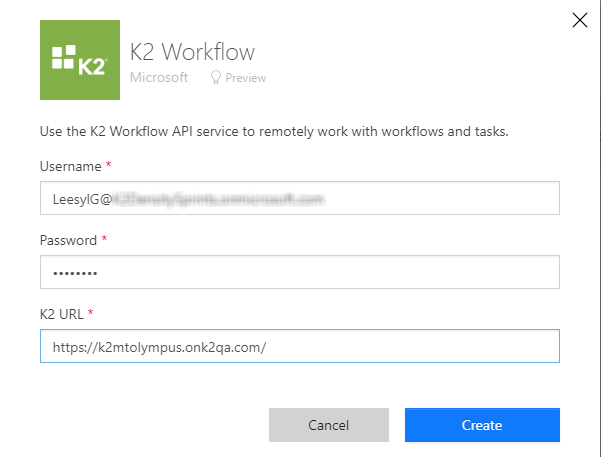
- Your K2 URL is the root URL of your K2 instance
Available K2 Actions
The following actions are available on the K2 Workflow REST API endpoint and described below the image in three parts: Tasks, Server Events, and Workflows: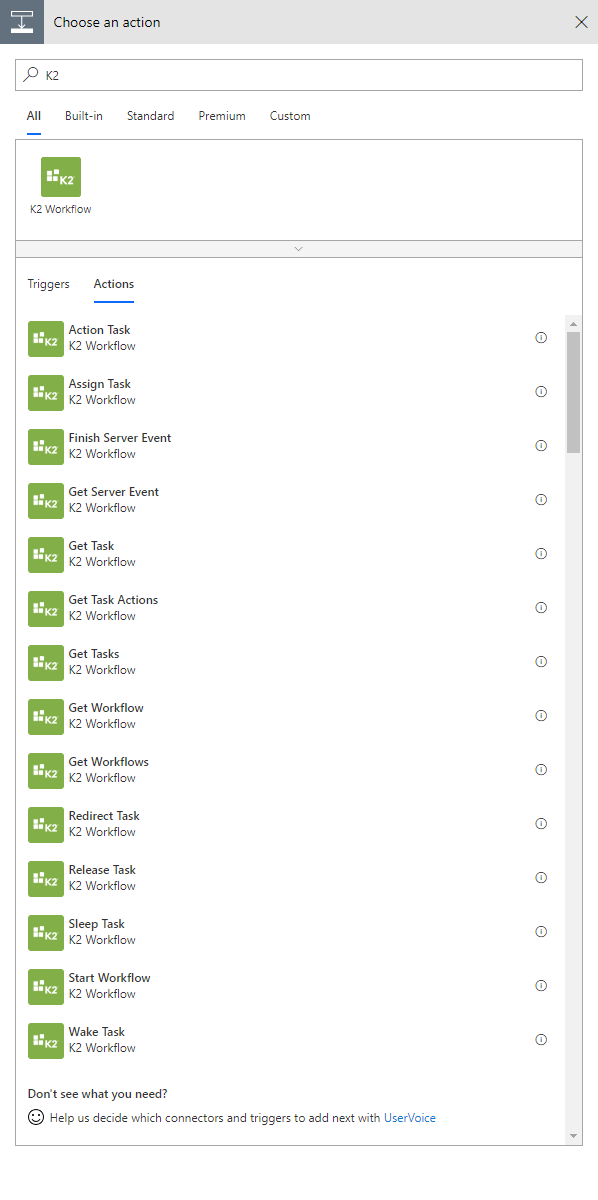
Tasks
You can use Microsoft Power Automate to action and manage K2 tasks. Integration with a task requires its unique serial number. For example, when using an Outlook trigger, you can configure the subject of the task notification in your workflow definition to send the serial number to a flow. When creating your task notification, use the task SerialNumber field from the Workflow Context Browser in a Replace function to remove the SN= portion of the serial number context as the flow only needs the number. See How to: Use the K2 Workflow REST Feed with Microsoft Power Automate to Redirect a K2 Task for an example of redirecting a task.
The following task-related actions are available:
- Get Tasks: Returns a list of tasks
- Get Task: Returns information about a specific task
- Get Task Actions: Returns a list of actions available for the task, such as Approve or Decline as defined in the workflow
- Redirect Task: Sends the selected task to another person for completion. Once you redirect a task, it is removed from your task list and appears on the other person's task list
- Sleep Task: Pauses or suspends a work item for either the specified duration or until the specified date
- Release Task: Sends the task back to be available to someone else, such as someone you've shared the task with or some other recipient of the task
- Wake Task: Returns a sleeping task to active
- Assign Task: Sends the selected task to another person for completion
- Action Task: Completes the action. You can use the Get Task Actions action to get the list of actions available, then use this action to complete the task.
The POST task actions (redirect, sleep, release, wake, assign, and action) have default and further HTTP Status options. See Workflow REST API: Tasks for more information.
Server Events
You can use server events to interact with a K2 workflow step. Configure your flow to wait for the workflow step server event which sends a JSON string. Use the information from the JSON string to perform other flow tasks, and when they are complete, use the Finish Server Event to notify K2 that the workflow step is complete and the K2 workflow coan continue. See How to: Use the K2 Workflow REST API Server Events in Microsoft Power Automate for examples of using server events.
The following server event actions are available:
- Get Server Event: Returns a server event JSON definition string
- Finish Server Event: Sends a finish response to an async server task awaiting a response
Workflows
You can start a K2 workflow from Microsoft Power Automate. See How to: Use the K2 Workflow REST Feed with Microsoft Power Automate to Start a Workflow for examples of using SharePoint and Outlook triggers to start a workflow.
The following workflow actions are available:
- Get Workflows: Returns a list of available K2 workflows
- Get Workflow: Returns the workflow metadata definition from a specific workflow
- Start Workflow: Creates and starts a new instance of the workflow
Considerations
- You must enable the Workflow API in K2 Management site before the API will be available for integration. See Configuring the Workflow REST API for more information
- You cannot log in to the Workflow REST API using Basic Authentication with an Azure Active Directory account that has Multi-Factor Authentication (MFA) enabled. If you have MFA enabled, you must use the custom connection configured with OAuth as described in Create a custom connector in Microsoft Power Automate to call the K2 Workflow REST API.
